Bust out those heirlooms with a Tomato Galette!
This post is a shout out to my fabulous pastry instructor and mentor: Jennifer Altman, pastry chef of Baywolf Restaurant in Oakland. One day in class she shared her recipe for a tomato galette with me, and it remains my favorite way to celebrate gorgeous summer tomatoes. Oh yeah, and it’s quite simple. Well, if you know how to make galettes…

Let’s start with the dough. You need a pastry board or a counter top that you can spread out and get messy on. Spread out your flour.

Take half of the butter (which is very cold) and use a bench scraper to cut it into the flour, tossing constantly to coat.

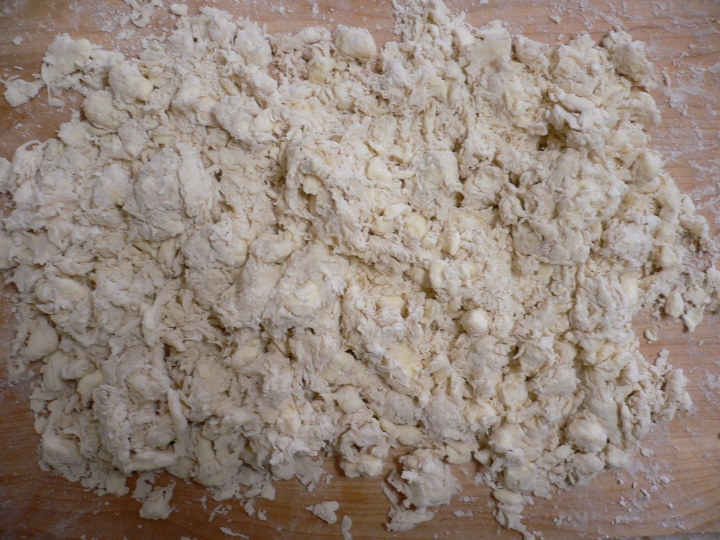
Once the chunks are the size of lima beans, start cutting in the other half. Keep cutting until the last batch of butter is the size of quarters. This ensures that some butter gets broken down to coat the flour, while the rest remains in large chunks that will turn into flakes. It should look like this:

Then take your ice cold water and basically “flick” it onto the flour, tossing constantly. Keep going until the flour is shaggy. It’s ok if there are still some dry bits, just make sure that it will smash into a dough when you press it with your fingers.

Then comes the fun part: you smear it. Literally. You use the heel of your hand to smear it into strips on your board. This is like pie crust magic in the making. All those large chunks of butter are now in the form of long sheets.

As you smear the butter, use your bench scraper to scrape it off the board and throw it in a pile somewhere to rest while you work on the rest.

Once finished, smash it into a plastic wrapped disk and pop it in the fridge for at least an hour. The dough should look like marble, with the butter swirled in. Spend this time slicing your tomatoes and shredding some gruyere cheese.

Once it has chillaxed, roll it into a circle that is about 1/8 – 3/16″ thick. You’ve got a lot to do to this future galette, so moving quickly is important. The longer the dough is at room temperature, the warmer the butter gets. And warm butter is a no-no in flaky pie crust land. It also makes it nearly impossible to work with.

Then spread on some good dijon mustard. Not too much, just enough to give the galette a little kick.

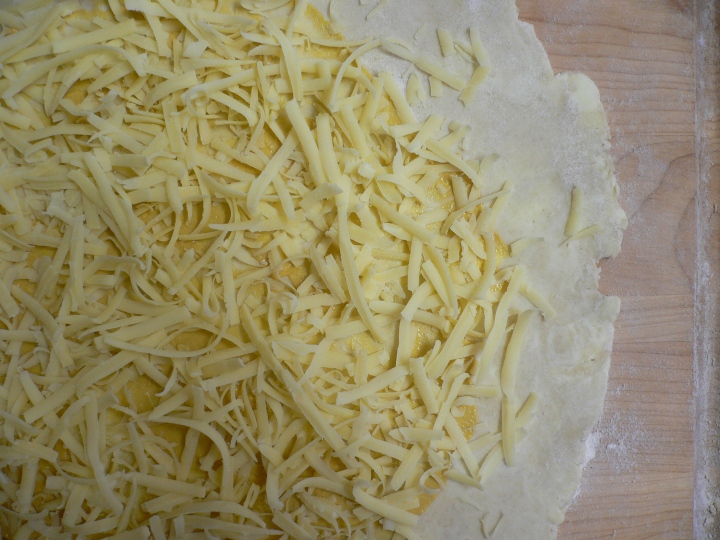
Then spread on a thin layer of gruyere cheese. Obviously the better the cheese, the better the galette.

Now place the tomato slices on top. Make sure you trim the edges of your dough. I usually do this before I start piling on the filling, but I forgot this time.

Now fold the edges onto the filling. Some people are into pleats, but Jennifer taught me that any time you have dough folded onto itself, it’s nearly impossible to cook it all the way through. And thanks to her I too am a fanatic about not eating raw dough. Once your galette is finished being assembled, slide it on a parchment lined sheet pan and pop it in the freezer. This will help keep it from immediately melting into a shapeless blob when it goes into the oven.

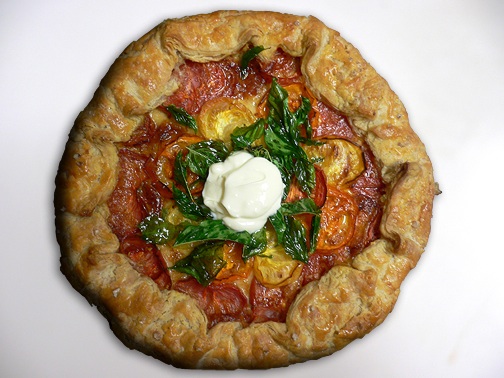
Then you paint a little egg wash on the crust, and since it’s savory, sprinkle on a little chunky sea salt. Then bake it at 375 until it’s browned on top. Reduce the heat to 325 and continue to bake until the bottom is golden brown. It usually takes about an hour total. Let it cool for 10 minutes and top it with some creme fraiche (homemade if you got it) and some basil. I like to fry the basil leaves to give a nice crunchy contrast to the gooey yummy tomatoes and cheese. Now you dig in!


Brandi, this is the most beautiful thing! I talked about heirlooms the other day on my blog, http://partnersindesign.wordpress.com/2009/08/13/heirloom-tomato/. I would really like to add “I Made That” to our blog roll… may I? Our blog is about design/food/travel and lots of things in between. I like your simple photographic process shots. The butter pads on flour is worth framing. Good luck to you.
Thank you for your compliment! Of course you are welcome to add me to your blog roll. I’ll check out partners in design tonight!
I made the gallette this weekend… well it turned out perfect and this pastry recipe is fabulous. We added some black zebras and heirloom greens to the mix… what a look! Brandi did you intend to leave off the ingredient list for the pastry? We guessed and referenced other recipes. We came up with 2 and half cups of flour, 1/2 cup cold water and 2 sticks butter. It yelded 2 disks. We broiled the top just for a few minutes to steam off some of the excess juice and crisp the dough.
Ooops Sorry! Sometimes I get so excited about technique that I forget about recipes…That sounds about right though, the water amount changes depending on the weather and the dough gods. It’s best just to keep adding until you can press it together and it looks like dough instead of shaggy crumbs. I’m so glad you liked it, it’s my favorite way to celebrate fresh heorloom tomatoes.
[…] Not a vegetable, but a fruit. Forget the fig as a metaphor for passion… it’s the tomato. Chemically they’re truly aphrodisiacs. I think tomatoes are the sirens of the garden. Cooking a tomato sauce is the epitome of slow food. See what a friend does with a few heirlooms and a great pastry crust. Brandi in San Fransicco has a great foodie blog. […]
Hi Brandi, I love this recipe and I am obsessed with heirloom tomatoes… (this is pretty common I hear) so thanks for the awesome post!!
[…] Make pastry. Directions for that here. Let pastry relax in fridge for an hour while you prep apples and prepare […]
[…] I use the 3:2:1 ratio, but I treat the dough like a quick puff. There are other techniques, (I use this one when making galettes, because I don’t want such intense flakes there.), but I like this one […]
[…] made a pie dough using the smear technique, making butter chunks a little smaller than usual. My goal was to have a flakey dough, but to keep […]
[…] wanted to make a lattice top, so I decided to use the frissage technique (more detailed instruction here) for my pate brisee dough. This dough gives plenty of flake without all the puffing up of a […]
Brandi…is this you??? One of the Pastry 14?
yes Patt, it’s me!
[…] tomato galette […]
[…] tomatoes? OH. EM. GEE. I’ll need to stock up on my pie dough, because I’ll be eating one of these every damn […]
[…] however instead of using pre-fab puff pastry, I’m going to try bedding them down in galette dough made like this. I made that (linked recipe for tomato galette) with the bounty of beautiful, delicious heirloom […]
[…] it was, this pie gave me an excuse to try out the smear pastry technique demonstrated over at I made that! I could see the idea going over well in an anger management […]