Halloween Candy Corn!
I know it’s been a little while since my last post. I went on a much needed vacation to Seattle with some girlfriends for a little girl’s weekend. A 5 day weekend, but a weekend non the less. Two of my friends were the architects for the new Delancey pizzeria (if you read the blog Orangette, you’ve probably already heard of it) in the Ballard neighborhood and we were itching to check it out. I’m happy to report the pizza and the restaurant were amazing, as well as the entire city of Seattle, which stole my heart. It was my first time there and hopefully I’ll be returning soon.
But back here in San Francisco, it’s Halloween! I actually am not motivated at all this year, so instead of partying with my friends, (I have to get up early and I’m old and lazy! Stop judging me!) I’m making candy corn. I’ve seen this recipe floating around on the web and have been curious, so it was good timing.
I started by boiling granulated sugar, corn syrup and butter for about 5-6 minutes. I mixed in some vanilla and let it cool for 15 minutes.

While that was cooling, I sifted together powdered sugar, powdered milk and salt in a large bowl.
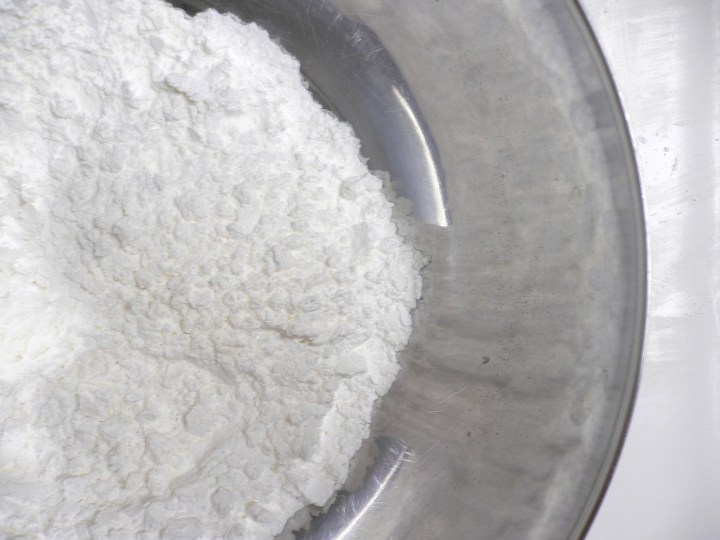
I poured in the warm sugar mixture.

I kneaded until it was a smooth dough.

Then I split it into 3 parts and mixed in some food coloring.

I rolled the dough into thin ropes and pressed the 3 colors together.

Then I sliced them into triangles.

And then spent an embarrassing amount of time squishing each little piece together. Since I lost steam pretty fast, John came to the rescue. It made a certain amount of sense, since he’s the one that will be feasting on these little sugar bombs for the next week!
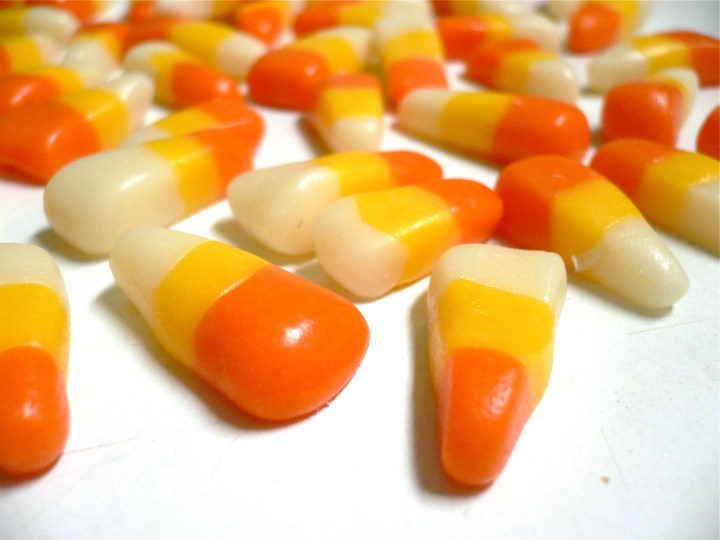
UPDATE: We’ve had 3 little kiddies visit us for our homemade candy! That alone was worth it!
CANDY CORN RECIPE:
yields aprox. 300 3/4-inch pieces
1 cup white sugar
2/3 cup corn syrup
5 tablespoons unsalted butter
1 tablespoon vanilla extract
2 1/4 cups powdered sugar
1/3 cup powdered milk
1/4 teaspoon kosher salt
10-40 drops red and yellow food coloring
– Heat white sugar, corn syrup and butter in a sauce pan over low heat. Stir until all ingredients are dissolved. Turn heat to high until mixture comes to a boil. Once boiling, reduce heat to medium and let bubble (uncovered) for 5 minutes.
– Stir in vanilla extract and remove from heat. Allow to cool until warm to the touch (about 15 minutes).
– In a large bowl sift powdered sugar, powdered milk and salt. Add cooled mixture from sauce pan and stir until it’s too thick. Begin to work with your hands and knead the dough until all of the powdered sugar have been absorbed.
– Divide dough into 3 sections, make a dent in 2 pieces and add 20 drops of yellow food coloring to each. In one of those, add 9 drops of red food coloring to create orange. Mix each until colors are even throughout.
– To make candy corns, eyeball 1/8th of the dough from each piece. Roll each color into long ropes and press together. Cut with a bench scraper or knife and smoosh the seams together. John reported good luck with microwaving them in short bursts to keep the dough warm. Allow the candy to cool and air dry.
– Once dry, store in an airtight container.
Salt and Pepper Soup Crackers!
Seriously, get ready for the cutest little soup crackers ever. So simple, so fast, but totally worthwhile.
You start with a basic biscuit dough, but one with very little butter. You can spice them up however you like. On this batch I made salt and pepper crackers, since I didn’t know what kind of soup they were gonna land in.

After the dough relaxes for a bit, roll it out to be very thin. Then stamp or cut into whatever your desired shape. I went with the smallest fluted cutter I had, because it’s cute.
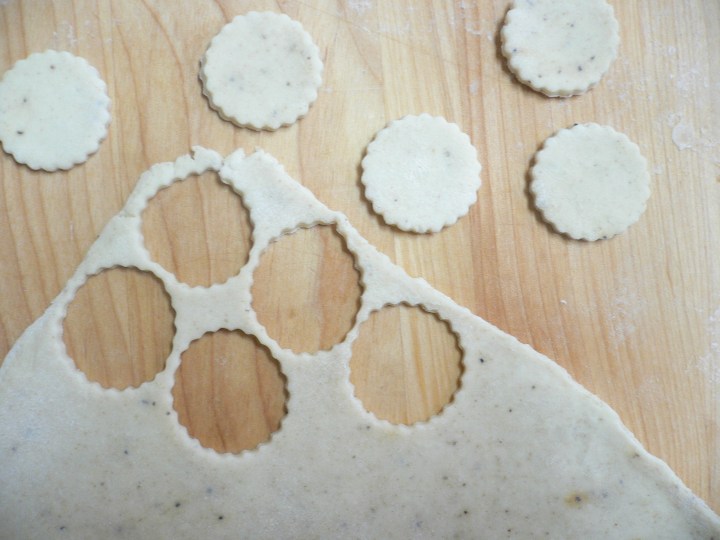
Use a skewer or a fork (I ripped one of the teeth off of a plastic fork) to poke little holes in the crackers. You want to try to go all the way through, this helps them bake evenly and keeps them from totally ballooning up in the oven.

The you brush them with melted butter and sprinkle on some salt.

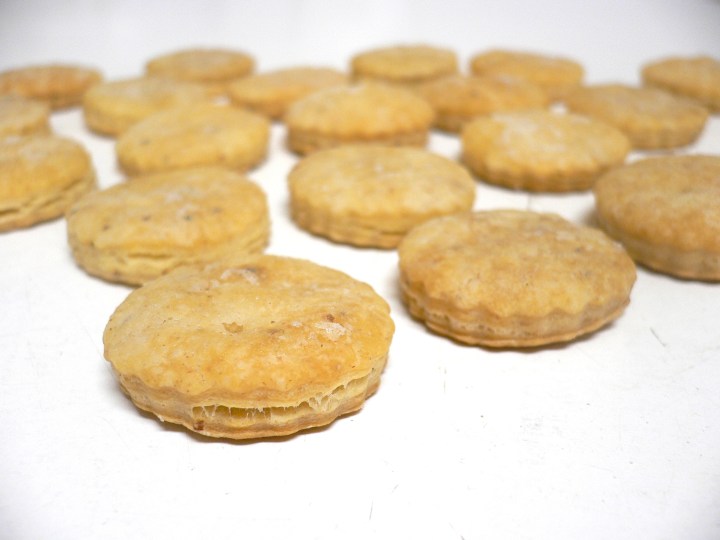
Then you bake them until they’re nice and crispy!

And aren’t they frickin’ adorable?! These ended up in a delicious delicata squash soup. I think next I’m gonna play with a spicy version to go in a chili….yummmmm.
OYSTER CRACKERS RECIPE:
2 cups AP flour
1/2 tsp baking soda
1 tsp salt
2 TBSP butter, cold
2/3 cup milk
– Mix dries.
– Mix in butter by squishing into the flour with your fingers.
– Mix in milk.
– Let rest for 1 hour.
– Roll very thin.
– Stamp out shapes.
– Poke holes.
– Brush with melted butter sprinkle with salt.
– Bake at 375 until browned and crispy (9 – 12 minutes, depending on size).
Apple Dumpling, Where Have You Been All My Life?
So I don’t know about you, but I just recently (yesterday) heard about this mythical apple dessert called an “Apple Dumpling”. There were rumors of whole apples wrapped in pastry crust, doused with maple syrup and baked until perfection is achieved. It really didn’t take much (any) more convincing for me to run right out to the grocery store and snatch up some apples. It was perfect timing too, because I had my friend Felicia from pastry school over for dinner. It was our first dinner “date” and I was struggling with finding the right dessert. I mean, she studied right next to me in class, so I couldn’t just serve up some crappy dessert. But at the same time, she knows how labor intensive this stuff can be, so I didn’t want to look desperate and overachievery. So along came the apple dumpling to rock my dessert world…

First step, I made a flaky pie dough.

Then I peeled and cored my apples.

“But how did you core those apples so perfectly?” you ask…”With this newfangled apple corer!” I say. It doesn’t get to come out of the drawer very often (I mean how often does the need to gut an apple arise?), but every time I use it I feel like an explorer digging up core samples in Alaska. Makes me feel very special indeed.

Then I rolled out my dough and cut it into squares, one for each apple.

I placed the apples on the pastry and filled them with butter and sugar.

Then I wrapped them completely in the pastry. At this point I was feeling a bit skeptical. Is it just me or does this just look like an apple wearing a diaper?

But I continued along, loading them into a tray and popping them back in the fridge to firm back up.

When I was ready to bake I soaked them down with maple syrup spiced with cinnamon and nutmeg.

And then baked them until they were nice and golden. And Oh my lord, it was kind of intimidating. I was regretting the size (gigantic!) of my apples, but somehow there wasn’t much left on my plate… Really, you just can’t go wrong with apples baked in flaky pastry and maple syrup.

RECIPE (adapted from Rustic Fruit Deserts):
pastry:
2 cups (10 oz) AP flour
2 TBSP sugar
1/4 tsp salt
7 oz butter, cold and chopped into tablespoons
~ 1/2 cup cold water
maple glaze:
1 1/2 cups water
1 cup grade B maple syrup
1/2 tsp cinnamon
1/4 tsp nutmeg
apples:
6 small apples
2 TBSP unsalted butter, cut into 6 equal pieces
6 tsp sugar
– Preheat oven to 425.
– Make pastry. Directions for that here. Let pastry relax in fridge for an hour while you prep apples and prepare glaze.
– Combine water, maple syrup, cinnamon and nutmeg in a pot. Simmer over medium heat for 5 minutes. Set aside.
– Peel and core apples. If you don’t have a corer, slice apples in half and cut out core.
– Roll out dough to form an 18″ x 12″ rectangle. Cut into six 6″ squares.
– Place an apple on each square and fill each cavity with 1 piece of butter and 1 tsp of sugar. Wrap the pastry around the apple, pinching it together to entirely cover the apples. Place the wrapped apples, gathered dough end down in a pan.
– Pour the glaze over the apples.
– Bake for 20 minutes, then turn oven down to 250 and bake for 40 more minutes, or until the pastry is golden and cooked all the way through.
– Serve warm, with the maple glaze spooned over the top.
My Favorite Spicy Lemony Tuna Salad Recipe
I know, this seems like a boring post. While tuna salad is pretty low on most people’s list of awesome food, I’m stoked to share this one. And my friend Pantea asked for my recipe and I fgured “What better way to pass it along?” For years I was a tuna salad hater (a part of my general condiment phobia). It just seemed like all the tuna salads I had encountered were blobs of mayonnaise. But then I learned how to make mayonnaise from scratch, and that opened up a whole new world for me. So this is my version of tuna salad, with some of my favorite things in it. My salad includes asian pear, lemon zest and juice, jalapeno pepper, another mild pepper, arugula and pecans. All of which make right now the perfect time of year for a tuna salad sandwich! Rule #1 in my salad though: good canned tuna packed in oil, not that cheap stuff in water. Since I go light on the mayo, that oil is needed for moisture. If I was feeling like a badass we would be talking about poaching fresh tuna instead of using canned, but that kinda requires making a much larger batch of salad.

Since the jalapenos pack a punch, you want to get them diced very fine.

Once you’ve got everything chopped, you basically just mix it all together. But first toss the tuna in a bowl and break up the large chunks. I usually drain the oil out of half and use the other half in the salad.
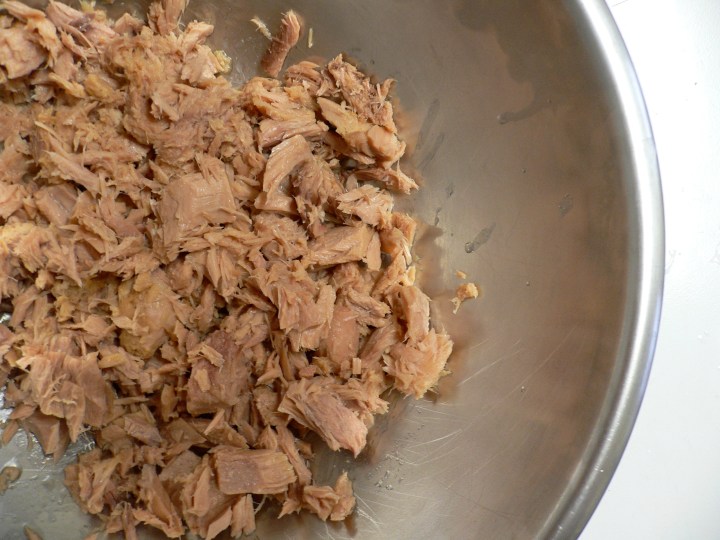
Then add everything else.

Mix and enjoy!

SPICY LEMONY TUNA SALAD RECIPE:
10 oz of tuna packed in olive oil
1/2 cup diced mild pepper (bell, gypsy, banana)
1/2 cup (2 oz) chopped pecans
1/2 jalapeno (or more if you’re into it)
1 (3.5 oz) diced asian pear or apple
3 TBSP mayonaise
Zest and juice of 1 lemon
large handful of arugula, chopped
2 TBSP finely diced red onion (not shown here, I forgot to buy one)
black pepper to taste
Rainy Day Chicken Pho
For once the weather was aligning with my culinary schedule. This week I decided to complete my 2nd Daring Cooks Challenge and the recipe was for Chicken Pho (Vietnamese Chicken Noodle Soup). I had a pile of friends over to help me eat it, (and er…to have an excuse to play board games). Of course there was way too much, because you see, I’m a recipe doubler. So I was staring down a long week of soup that nobody eats. But then it happened. The first big storm to kickstart San Francisco’s rainy season. And what’s better for rain (and warding off rumors of swine flu) than chicken noodle soup?
The key to a successful Chicken Pho is the broth. You want to get as much flavor as possible into it, while maintaining a clear, uncloudy broth. You achieve this by par-boiling the chicken to get the weird stuff to cook out. Then you throw out the water, rinse the half cooked chicken and start over with fresh water. Supposedly you should be skimming the impurities from the top every 20 minutes, but I swear I couldn’t find any. After the gingery chicken soup boiled for 2 hours I removed the meat and strained the liquid to remove all the spices and other odd bits floating around. Then I shredded the chicken into bite sized pieces.
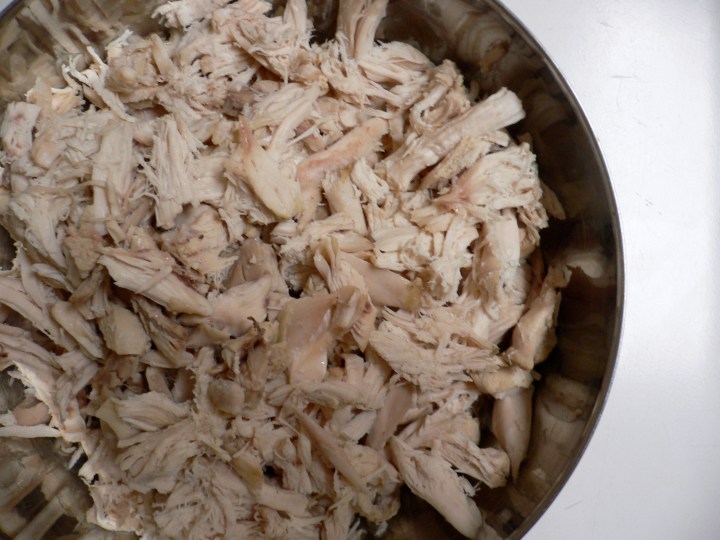
I started preparing my condiments. Pho is all about the condiments. I thought I could get by with just the fresh stuff: bean sprouts, cilantro, jalepenos, lime. But my friend Huong set me straight and went right out to the store to get some sriracha hot sauce and hoisin sauce. And I was thankful because they definitely made a difference.

To plate a bowl of pho you first lay in some freshly boiled rice noodles.

Then fill the bowl up with the fresh toppings.

And then ladle in some hot broth. From this point it gets personal, everybody seems to have their own style for saucing it up.

This month’s Daring Cooks challenge was hosted by Jaden of Steamy Kitchen. You can find her recipe for chicken pho here. Happy souping!
Cookies for Leia!
My best friend from childhood, Leia, is currently in Iraq serving as a medic in the National Guard. She’s been there for 3 months and (SHAME ON ME!) I haven’t even sent her a care package yet. But today that all changes. I’ve been baking up a storm in the cookie department and am ready to ship over some treats. I recently bought the Martha Stewart Cookies cookbook, so I’m using this as my chance to try out some of the recipes. I just hope they survive the long postal journey across the planet!
First up – Lime melt away cookies! I’m a sucker for lime flavored things personally, and am hoping that this flavor might remind her of summertime in Florida.

The generous amounts of lime peel make it a beautiful dough. After baking, they get rolled a few times in powdered sugar which will sweeten them up and help them melt in your mouth.
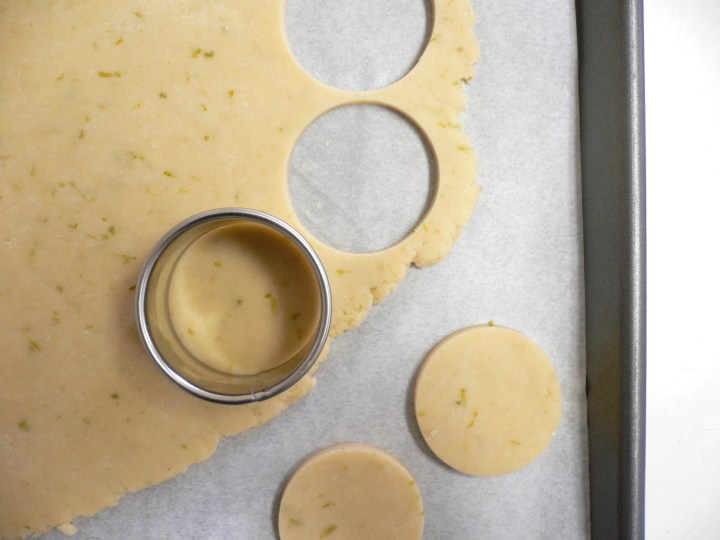
And since it’s starting to feel like fall, I made some chocolate gingerbread cookies.

They got rolled in sugar before baking, to give them a nice sugar crust when they are cooled.

I’m also a sucker for the lemon and pistachio combo, so I found a chewy cookie recipe with those flavors.

But after they baked they looked a little plain, so I gave them a little extra kick with a lemon glaze.

And last, but not least – Maple Pecan Shortbread cookies. Lots of maple syrup made these a super yummy addition (in my humble opinion)…

They got topped with pecan halves and sprinkled with turbinado sugar before baking. The pecans are from my uncle’s tree, just down the road from where me and Leia grew up. I haven’t lived in Alabama since 1996, but pecans still remind me of home. Hopefully they’ll do the same for Leia!

So many cookies!
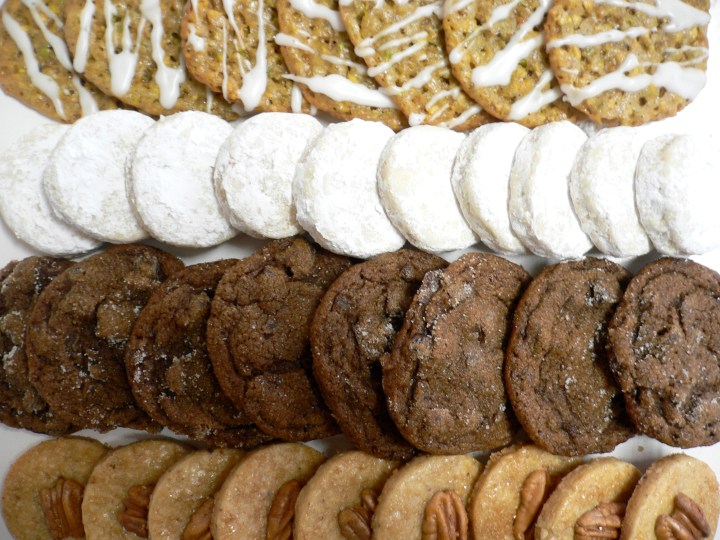
And of course I included some chocolate dipped raspberry marshmallows. I had some vanilla meringue kisses lying around and tossed those in too. I found some cute polka dotted bags to wrap the cookies up in, though I didn’t think about ribbon…so they were tied with twine. I was in such a rush to get the box to the post office that I forgot to put a letter in! So hopefully this post counts as the letter. Let me know when you get your package Leia! Be safe and I love you!

RECIPES (from Martha Stewart):
KEY LIME MELTAWAYS:
12 TBSP (6 oz) unsalted butter, room temperature
1 cup powdered sugar
Grated zest of 2 limes
2 TBSP freshly squeezed lime juice
1 TBSP pure vanilla extract
1 3/4 cup plus 2 TBSP all-purpose flour
2 TBSP cornstarch
1/4 tsp salt
1. In the bowl of an electric mixer fitted with the whisk attachment, cream butter and 1/3 cup sugar until fluffy. Add lime zest, juice, and vanilla; beat until fluffy.
2. In a medium bowl, whisk together flour, cornstarch, and salt. Add to butter mixture, and beat on low speed until combined.
3. Between two 8-by-12-inch pieces of parchment paper, roll dough into two 1 1/4-inch-diameter logs. Chill at least 1 hour.
4. Heat oven to 350 degrees. Line two baking sheets with parchment. Place remaining 2/3 cup sugar in a resealable plastic bag. Remove parchment from logs; slice dough into 1/4-inch-thick rounds. Place rounds on baking sheets, spaced 1 inch apart.
5. Bake cookies until barely golden, about 15 minutes. Transfer cookies to a wire rack to cool slightly, just three or four minutes. While still warm, place cookies in the sugar-filled bag; toss to coat. Bake or freeze remaining dough. Store baked cookies in an airtight container for up to 2 weeks.
MAPLE PECAN SHORTBREAD:
- 2 1/4 cups all-purpose flour
- 1/2 cup cake flour
- 1/2 tsp salt
- 3/4 cup pecan halves (about 2 1/4 ounces), finely chopped
- 1 cup (8 oz) unsalted butter, room temperature
- 3/4 cup sugar
- 1/4 cup grade B maple syrup
- 1 egg yolk
- 1 large egg, lightly beaten
- Turbinado sugar, for sprinkling
- Into a medium bowl, sift flours and salt. Whisk in 1/2 cup chopped pecans, set aside.
- In the bowl of an electric mixer fitted with the paddle attachment, cream butter and granulated sugar on medium-high speed until smooth and light, about one minute. Add the maple syrup, egg yolk, and extract; beat on medium speed until well combined. On low speed, gradually add flour mixture, beating until just combined. Dough should be smooth and pliable. Flatten into a disk. Wrap in plastic; chill until firm, 1 1/2 hours or overnight.
- Preheat oven to 350 degrees. Line baking sheet with parchment paper.
- On a lightly floured work surface, roll out dough to 1/4 inch thick. Cut out rounds using a two-inch cookie cutter; place one inch apart on prepared baking sheet. Brush tops with beaten egg; sprinkle centers with remaining 1/4 cup pecans. Sprinkle the entire surface with turbinado sugar.
- Bake cookies, rotating baking sheet halfway through, until golden around the edges, 10 to 12 minutes. Transfer to a wire rack to cool. Store in airtight containers at room temperature up to four days.
Because Sometimes You’re Just Feeling Pink and Fluffy
Today was fun. While lazing about the house with a sad tummy, I was thinking of marshmallows. Not eating them, just making them. After a botched attempt last year I was feeling the need to redeem myself. Several hours later I became a believer that EVERYONE should make homemade marshmallows. Just once. It is total kitchen magic. I had the itch (and some extra egg whites) and decided to make a batch of raspberry flavored mallows.
I started by oiling and then dusting a pan with powdered sugar and cornstarch.

Since it takes a while to get up to temp, I started boiling my sugar syrup.

Then I rubbed some vanilla bean seeds with a bit of sugar.

I tossed that in with some raspberry puree (still had some of the freezer from this day). Then I sprinkled on some gelatin, stirring to keep it from clumping.

Since it immediately becomes stiff, I placed it over a pot of simmering water to melt the gelatin down. This part is a bit tricky: You want the gelatin warm to loosen it up, but if it gets too warm it smells just awful. So have your nose be your guide. If you can smell it, remove it from the heat and stir using the residual heat. If your house suddenly smells like livestock, you have gone too far. I did that once and couldn’t eat a marshmallow for a year. Seriously, gelatin is creepy. In a fabulous sort of way.

I started whipping some egg whites into a stiff meringue.
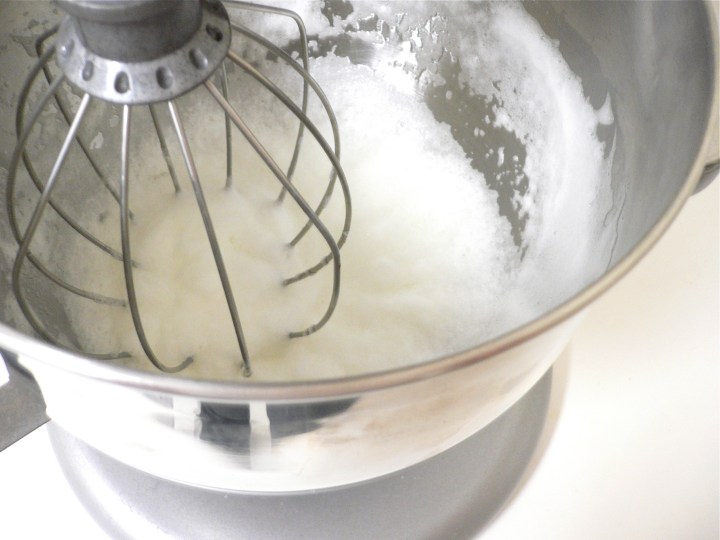
And then slowly poured in my syrup. I let that whip for a few seconds, and poured in the raspberry mixture. I continued whipping, until the marshmallow had cooled and tripled in volume.

I poured the marshmallow onto the prepared pan.

And attempted to flatten it out.

I let it sit for 3 hours and then turned it onto a powdered sugar coated board. I sprinkled on a thick layer of more powdered sugar and let it sit for another hour.

Then I started slicing!

I rolled the little squares in more powdered sugar and played with them for a while.

And what do we do with fresh yummy squishy marshmallows? We dip them in Chocolate!

RASPBERRY MARSHMALLOW RECIPE:
14 oz sugar
1 TBSP corn syrup
3/4 cup water
1/4 cup (1 oz) gelatin
3/4 cup raspberry puree
1 TBSP sugar
1/2 vanilla bean
2 TBSP water
2 egg whites
1 TBSP vegetable oil
1/4 cup powdered sugar
1/4 cup cornstarch
– Mix the cornstarch and powdered sugar together. Prepare a 9″x13″ pan by greasing it lightly with vegetable oil. Dust it with half of the powdered sugar mixture.
– Combine granulated sugar, corn syrup and 3/4 cup water in a pot over low heat. Stir until the sugar is dissolved. Stop stirring, bring to a boil. Place a thermometer inside. You want the syrup to eventually reach 260.
– While syrup is boiling, mix together vanilla bean seeds and 1 TBSP sugar. Rub with fingers until seeds are incorporated into sugar. Mix raspberry puree, water and vanilla sugar in a bowl. Sprinkle gelatin on top, stirring it in to keep it from clumping. Place this over a pot of simmering water to melt the gelatin.
– Begin beating the egg whites until stiff. Once they are stiff and syrup is at 260, begin slowly pouring in syrup while continuing to beat the whites. Beat for 30 seconds to incorporate.
– Beat in raspberry puree mixture. Continue beating until marshmallow mixture is cooled and tripled in volume.
– Immediately pour into the prepared pan and quickly smooth the top flat. Let the marshmallow sit, uncovered, for at least 3 hours at room temperature.
– Dust a work surface with the rest of the sugar cornstarch mixture. Run a knife along the edges to loosen the marshmallow and turn out onto the surface. Cover with a layer of powdered sugar and let sit for 1 hour to develop a sugar crust.
– Cut the marshmallow into squares and toss the squares in powdered sugar. Store in an airtight container for up to a week.


7 comments