The Henderson Family Chocolate Meringue Pie
It’s not so big here on the west coast, but in the South every family has a chocolate meringue pie recipe. It’s a source of pride, even if it involves cool whip and instant jello pudding (yuck!). This pie has been in my family as long as I have (I suspect longer), and I am proud to say that it is about the only thing my father makes from scratch — well, except for the crust, but one day I’ll show him the light. It’s a fairly simple pie, but it does take a little while to set up, so it’s best to be made in the morning or the day before it’s to be eaten.
First, since this pie will not be baked, a completely baked crust.
Then I made a chocolate pudding, which mostly involves a lot of stirring. Since there are egg yolks in the pudding, I poured it through a sieve.
And then filled my pie shell.
Then I made a meringue (actually my friend Pantea made the meringue, because it was Thanksgiving and I was doing 13 other things).
We used our fingers to pull strands of meringue into points, and then torched them until they were nice and golden. A word of warning: this is a messy pie. But it’s worth it.
CHOCOLATE MERINGUE PIE :
1 single crust pie pastry
Pudding:
2 cups sugar
6 TBSP flour
6 TBSP cocoa
1 tsp salt
6 egg yolks
4 cups milk
2 tsp vanilla extract
2 oz unsalted butter
Meringue:
5oz egg whites
10oz sugar
1 tsp vanilla extract
– Roll out pastry into a 12-13 inch circle, transfer and center into 9 inch pie pan. Place in freezer for 20 minutes.
– Line with foil, fill with weights (dried beans) and then bake in 400 degrees oven for about 20 minutes, or until beginning to brown and look set. Lower temperature to 350 and cook for another 15 minutes. Remove foil and beans and continue baking for another 10-20 minutes, until fully baked. Set on wire rack to cool.
– Mix sugar, flour, cocoa and salt in medium bowl. Mix in egg yolks. Mix in milk 1/2 cup at a time, to prevent lumps.
– Pour mixture into heavy bottomed saucepan and cook over medium heat, stirring constantly, until thickened. How long this takes seems to depend on whether the gods are smiling on you that day. But it should be really thick and starting to boil.
– Remove from heat and stir in butter and vanilla extract. Pour through sieve into bowl.
– Pour into cooled pie shell and chill in fridge for at least 4 hours to firm up.
– Place sugar and egg whites in kitchen-aid bowl. Place bowl in pan of simmering water and heat, stirring constantly, until the whites reach a temperature of 140. Remove from heat and whip on medium high until the meringue has cooled and tripled in volume. Beat in vanilla extract.
– Spread over cooled pudding and shape. Use a propane torch to toast meringue edges. Keep in fridge until ready to eat.
Thanksgiving Peanut Pie
Ahhhh…Thanksgiving. I just love Thanksgiving. The whole ritual of spending a whole day (sometimes 2! sometimes 3!) planning and creating a meal to eat with your loved ones, it just makes me glow. Like everyone, I have my traditions, particularly in the pie department. But this year I decided to try something new. I had bought this can of Lyle’s Golden Syrup ages ago, in a sentimental moment (it was big in Australia). I, of course, never used it because, well, it’s British and I don’t have any British cookbooks. Several years ago a peanut pie recipe caught my eye. I mentally bookmarked it, but never found the right time to make it. It’s funny, I’ll try all kinds of things with cakes, but I tend to get a little rigid with pies. They’re just SO much work! But anyways, this year I decided would be the one, the year I made peanut pie for Thanksgiving instead of pecan pie. It was a bold move. John was terrified since he feels a deep and personal connection with my pecan pie. I almost backed down, until I ran across a recipe for a peanut pie that called for golden syrup. It was basically a sign. So I made it.
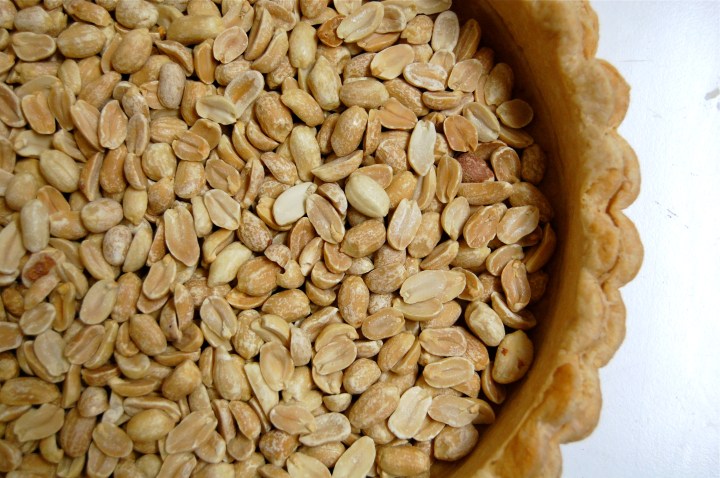
First I pre-baked a shell. I tossed some dry roasted peanuts inside.
Then I made the goo filling, which I poured on top of the nuts.
And then I baked it for 45 minutes or so, until it was set in the middle. To be honest, I wasn’t totally in love with this pie. It kind of tasted like a Baby Ruth candy bar. After years of oohing and aahing at the idea of peanut pie, I had some serious expectations. But in the end, I had a hard time fighting off the “I’d rather be eating my pecan pie” feelings. But then again, I make a mean pecan pie.
NORTH CAROLINA PEANUT PIE RECIPE (adapted from Scratch Bakery):
1 fully baked pie crust
1/3 cup (packed) dark brown sugar
1 vanilla bean
2 TBSP all purpose flour
1/2 tsp salt
1/4 tsp ground cinnamon
1/4 tsp cayenne pepper
3 large eggs
1 cup golden syrup
1 tsp apple cider vinegar
1/4 cup (1/2 stick) unsalted butter, melted, cooled slightly
1 1/2 cups dry roasted peanuts
– Preheat oven to 350.
– Rub seeds from vanilla bean into brown sugar to break up clumps.
– Whisk brown sugar, flour, 1/2 teaspoon coarse salt, cinnamon, and cayenne in medium bowl.
– Whisk eggs in another medium bowl to blend.
– Add brown sugar mixture to eggs.
– Add golden syrup, apple cider vinegar and melted butter to eggs and whisk to blend.
– Pour peanuts in pie crust. Pour in filling.
– Bake pie until filling is set, about 40 minutes.
What Hamburger Helper Wanted To Be When It Grew Up
I know, this post is really pushing it. Some of you will forever think I am just plain gross. It’s thanksgiving week and I’m posting a recreation of a classic Hamburger Helper dish. What can I say? I’m at home sick (it’s been a week, I’m dying here!), I’m moving to Seattle in 5 days, I want comfort food and I can’t help it, sometimes I just like to reverse engineer recipes. A year ago the chef at the restaurant I worked at cooked a family meal that smacked of Hamburger Helper, and since then I’ve been obsessed with recreating Cheeseburger Macaroni. But of course I needed to up the game, so I made it Bacon Cheeseburger Macaroni. Well…duh…I think that was an obvious move. Definitely not a date night dish, but great for those nostalgic moments (I can admit it, I grew up in Alabama eating some pretty trashy food). Don’t judge me too harshly.
I started by slowly cooking the bacon, to render its fat. I probably cooked it for about 15 minutes on medium low.
Then I added a diced onion, a carrot, a green bell pepper and a jalapeno. I know technically there weren’t vegetables in the Hamburger Helper version, but come on people, we’re adults now. Kind of. I cooked those on medium until the onions started to turn translucent. Then I threw in 2 minced garlic cloves and cooked it all for a minute more.
Then I added some ground beef and chili powder. I cooked it all until the beef was nicely browned.
Then I added in tomato sauce, tomato paste and worcestershire sauce. I cooked that for about 10 minutes.
Then I added the sour cream and cooked it a few minutes longer. This is the part where it looks seriously unappetizing. But if you can hang in there, it’s worth it.
I turned off the heat and stirred in the cooked macaroni and the shredded cheddar cheese. I stirred it for a good while, to melt the cheese into the sauce. Then I added salt and pepper to my liking. And then I ate it. I’m not gonna lie, this recipe makes quite a lot of pasta. Probably enough to feed 6-8 people. But this one time, when I was testing out the recipe, 4 of us ate the entire thing. And then ate an apple pie. Shameful.
Bacon Cheeseburger Macaroni Recipe:
3 slices bacon, diced
3/4 cup chopped onion
3/4 cup chopped green bell pepper
1/2 cup chopped carrot (optional)
1 jalepeno, chopped
2-3 garlic cloves, minced
1 lb ground beef
1 TBSP chili powder
1 TBSP worcestershire sauce
2 TBSP tomato paste
3/4 cup tomato sauce
1 cup sour cream
12 oz macaroni, cooked and drained.
8 oz shredded cheddar cheese
salt and pepper
– Cook bacon on medium low heat until it is halfway cooked and releases it’s fat.
– Add onions, bell pepper, carrots and jalepeno and cook until onions are translucent.
– Add garlic and cook for 1 minute.
– Add ground beef and chili powder and cook until browned.
– Add worcestershire, tomato paste, and tomato sauce and cook for 10 minutes.
– Add sour cream and cook for 5 minutes.
– Add noodles and stir well.
– Add cheese and stir well.
– Season with salt and pepper to taste.
Homemade Power Bars!
Things are a bit hectic around here these days. Moving is HAPPENING! We finally signed a lease on the cutest little house in Seattle, so now it’s packing, goodbye party planning, psychotic cooking of everything in the fridge so we don’t have to take it with us while trying to eat our way through a long list of restaurants and debating whether we can actually afford to replace all the furniture that we never liked anyways. And on top of all that, I’m sick with a cold. So what do we need for all of this? ENERGY! Homemade power bars have been on my list for a while. I actually made them for a hike that never happened, so they came in quite handy all week! Oh yeah, and they’re super easy. I used Heidi Swanson’s recipe from “Super Natural Cooking”, but then adapted it to the ingredients I had on hand. And I added in some maple syrup and upped the salt, because that’s how I roll.
First you throw a bunch of stuff in a bowl: oats, walnuts, flour, cereal, currants, ginger and coconut. Toss them around to coat everything in the flour.
Then I put the rest of the ingredients (rice syrup, maple syrup, sugar, vanilla, and salt) in a saucepan and simmered them until they thickened.
I poured the hot syrup on top of the oat mixture and stirred it all around to coat.
I pressed it into a sheet pan and let it cool down for a few hours.
Then I cut them into cute little bars! I have to say, at first bite we were like, “Meh, tastes like popcorn”. But then we just kept eating them and by the end we were convinced they were good. Not really sure what that means. Definitely worth making but I suspect I’ll be changing them up a bit next time.
Power Bars Recipe (adapted by Heidi Swanson):
1 TBSP mild oil
1 1/4 cups rolled oats
1 1/4 cups chopped toasted walnuts
1/2 cup whole wheat flour
1 1/2 cups unsweetened brown rice cereal
1 cup dried currants
2 tablespoons finely chopped crystallized ginger
1/4 cup shredded unsweetened coconut
3/4 cup brown rice syrup
1/4 cup maple syrup
1/4 cup sugar
1 tsp pure vanilla extract
1 tsp salt
– Grease a pan with the oil. If you like thick power bars, opt for an 8 by 8-inch pan; for thinner bars, use a 9 by 13-inch pan.
– Mix the oats, walnuts, flour, cereal, currants, ginger and coconut together in a large bowl and set aside.
– Combine the rice syrup, sugar, vanilla, and salt in a small saucepan over medium heat and stir constantly as it comes to a boil and thickens just a bit, about 4 minutes. Pour over the oat mixture and stir until the syrup is evenly incorporated.
– Spread into the prepared pan and cool to room temperature before cutting into whatever size bars you desire.
Bourbon Pecan Praline!
Yesterday a friend emailed asking me for a good southern praline recipe. I vaguely remembered someone making it at Tartine and found the recipe in their cookbook. I know, being from Bama I should consult some relative back home, or at least some dusty old stack of secret southern recipes. But the last recipe for candy my grandmother shared called for paraffin wax (like IN the brittle – YUCK!) and I have my limits. After typing up the recipe for her, it was all I could think about. I had all the ingredients already, so it seemed like a waste to NOT make some…
I started by toasting the pecans for a few minutes, to perk them up.

Then I mixed the sugar, cream, butter, salt, molasses and bourbon in a largish pot.

I let that boil, stirring occasionally, until it reached 240 degrees.

I let it sit in the pot cooling, still stirring occasionally, until it reached 210 degrees. I stirred in the toasted nuts, making sure to get them well coated. Then I poured the mixture out on a sheet pan. I let it cool for 1 minute to start setting up, then sprinkled sea salt on top. Because I like my candy salty. You can omit that step if you prefer unadulterated sweetness.

After it cooled completely I broke the praline into chunks. And then started passing it out to anyone who walked by. Because this stuff is like crack. Pure candy crack. Definitely dangerous, definitely best to share it before I scarf it all down myself! And did I mention that it took like 20 minutes? So really, there are no excuses.

BOURBON PECAN PRALINE RECIPE (Tartine Bakery):
2 cups (10 oz) pecan halves
3 cups (21 oz) sugar
1 cup (8 oz) heavy cream
4 tbsp (2 oz) unsalted butter
1/4 tsp salt
1 tbsp unsulphered molasses
2 tbsp bourbon
sea salt (optional)
– Preheat oven to 325
– Spread pecans on baking sheet and toast for 4 minutes. Let cool completely.
– Line another baking sheet with parchment. Set aside.
– In a deep heavy bottom saucepan, combine sugar, cream, butter, salt, molasses and bourbon
– Cook over medium high heat, stirring to break up lumps.
– Bring to boil and cook, stirring occasionally, until it registers 240 on thermometer.
– Remove from heat and let cool until it reaches 210.
– Add the pecans and stir vigorously (you have to work fast because it will start to thicken).
– Pour mixture onto the sheet pan and let it cool for 1 minute.
– Sprinkle on sea salt.
– Let cool for an hour and then break into chunks.
PreThanksgiving Day Pie Camp – Part 3
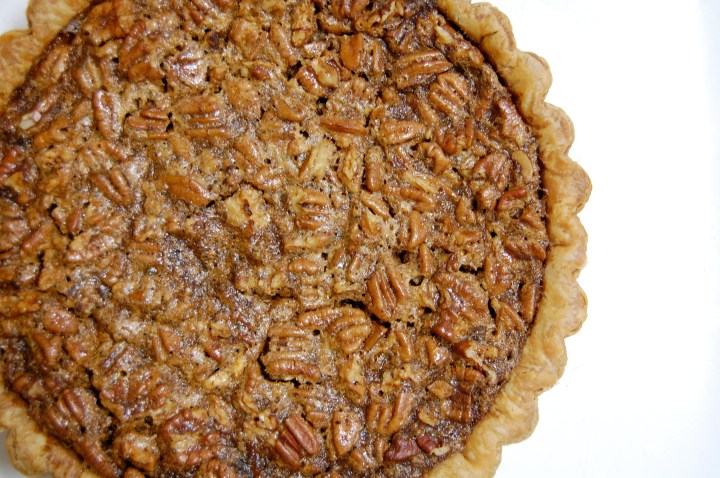
This was my 3rd pie for PreThanksgiving: A browned butter pecan pie. I made this one because according to John, it would be mean to NOT make it. I think it’s safe to say that this is HIS favorite pie. I start this pie the same as the others, by fully pre-baking the crust. Since my dough puffs up quite a bit when baking, I hold it down by placing inside a cake pan filled with beans (and I think there’s some rice in there too) on top of a parchment circle.

Once baked and cooled I pour in some pecans that I roughly chopped, since it helps the pie slice a little neater.

Then comes the gooey filling. I take pride in this recipe, I’ve tweaked and tweaked it until I think it’s just the right balance of sweetness, saltiness and nuttiness. They key is in the browned butter, which I think adds depth.

Then I pour the filling onto the pecans.

And since it is thickened with eggs a custard, I bake it at 350 instead of the higher heat some recipes call for. It’s finished when it just starts to show signs of cracking, and when it feels firm in the middle.
BROWNED BUTTER PECAN PIE RECIPE:
1 single crust pie pastry
4 oz unsalted butter
1 cup firmly packed light brown sugar
1 vanilla bean
3 large eggs, slightly beaten
1/2 cup dark corn syrup
2 tablespoons maple syrup
1/8 teaspoon ground cinnamon
1/4 tsp salt
1-1/2 cups coarsely chopped pecans
– Roll out pastry into a 12-13 inch circle, transfer and center into 9 inch pie pan. Place in freezer for 20 minutes.
– Line with foil, fill with weights (dried beans) and then bake in 400 degrees oven for about 20 minutes, or until beginning to brown and look set. Lower temperature to 350 and cook for another 15 minutes. Remove foil and beans and continue baking for another 10-20 minutes, until fully baked. Set on wire rack to cool.
– Using a shiny skillet or saucepan to melt the butter over medium heat. Stir butter and keep an eye on it as you wait for it to brown. You want the butter to be a good dark brown, but you need to catch it before it burns. Use your nose as your guide, it well smell nutty as it begins to brown. Once browned, transfer butter to a bowl to let cool slightly.
– Preheat oven to 350 degrees. Use fingers to rub seeds from vanilla bean into brown sugar, breaking up any clumps. Combine eggs, brown sugar, corn syrup, maple syrup, cinnamon and salt in a large bowl. Whisk well to blend. Add the browned butter and whisk again until evenly combined.
– Place the nuts in the cooled pie shell and pour in the filling.
– Place the pie on the center oven rack and bake until the filling, including the center, is set, 35 to 40 minutes. Rotate pie 180 degrees about halfway through. When done, the pie will have puffed slightly and developed cracks around the perimeter.
– Transfer pie to a wire rack and let cool thoroughly.
PreThanksgiving Day Pie Camp – Part 2
This is about my second (and favorite!) pie for PreThanksgiving this year: Ginger Almond Pear Pie. While most people gravitate to the sweeter fall pies, the fruit pies always get my vote. I am a freak for pear pie, and the addition of ginger and vanilla bean takes pear to a whole other level.

I started (as always) with a fully baked crust. Then I chopped up my pears. I like them pretty large, so they don’t turn to mush when baked. I tossed the pear chunks with sugar, the seeds from 1/2 of a vanilla bean, some shredded fresh ginger, cinnamon and cornstarch. I stuffed those into the pie crust, keeping in mind that they will lose about 50% of their volume when baked and cooled.

I then covered the spiced pears with some almond crisp topping that I had waiting for me in the freezer.
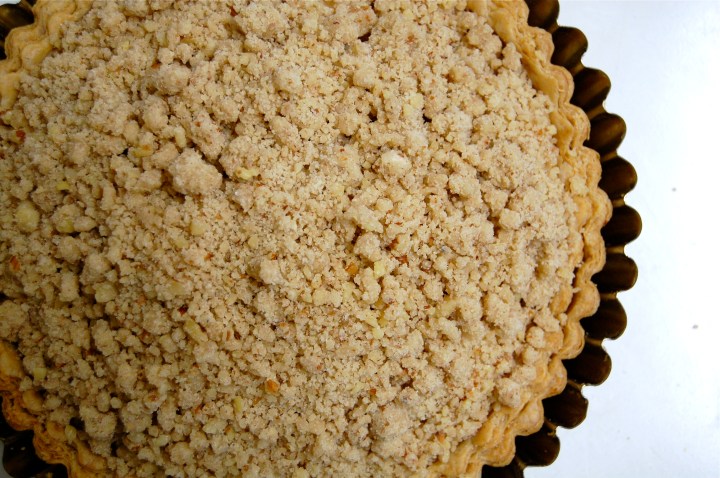
Then I baked it until the topping was browned and the pears were bubbling, which was about an hour. Once again, I don’t have a photo of the slice, but it was a mighty fine pie.
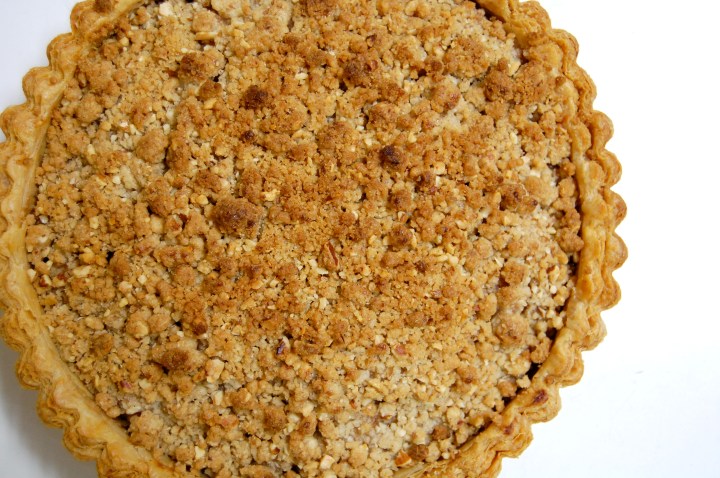
Nut Crisp Topping Recipe:
7 oz AP flour
3 oz brown sugar
3 oz sugar
1/4 tsp cinnamon
1/4 tsp salt
2/3 cups ground nuts
6 oz cold butter, cut into cubes
– Stir the dries together.
– Add the butter and mix in with your fingers. As the butter warms up, the mixture will begin to come together with a crumbly, but not sandy texture.
– Store in freezer until ready to be baked.
PreThanksgiving Day Pie Camp – Part 1
Every year, right around this time, something wonderful takes place. My friends gather for OUR version of Thanksgiving – without the family squabbles, awkward conversation and mediocre food. We call it PreThanksgiving, the idea being to celebrate right before everyone shuffles off to their families. I’m the proud owner of a giant deep fryer, which is where John shows the turkeys what’s what. Friends show up bearing delicious side dishes (people in San Francisco can COOK!) and before the night finishes there will be at least 2 and if we’re lucky all of the following events: an impromptu dance party, a food fight, kings cup, a piñata, a flip cup championship and music performances of songs written about each other.
My role in all of this: the pie, of course. I fancy myself a bit of a pie ninja, so there’s pressure to deliver something special each year. I usually make 3 pies: a pumpkin pie, a nut pie and a fruit pie. This year my pumpkin pie was the wild card, a pretty complicated construction consisting of 3 layers of pumpkin custard, crème fraîche whipped cream and a pumpkin caramel mousse.
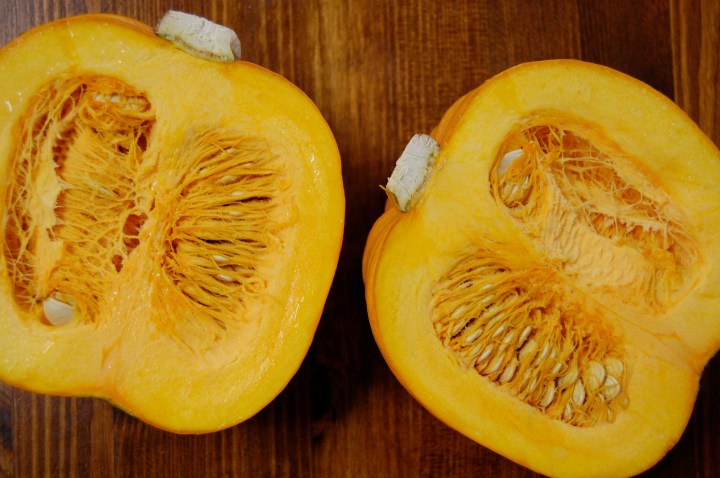
First step: roasting a pumpkin. Pretty simple, I just sliced it in half, scooped out the seeds, placed it cut side down on a tray with a bit of water and let it roast until it was soft (about an hour). Then I scoop out the flesh from the skin, purée it and let the water drain out.

Then there’s my crust. I don’t make pie too often, since I get kinda geeky with it and my crust alone is a bit of effort. I’m a firm believer in baking the crust all the way through, to avoid any soggy pie unpleasantness.
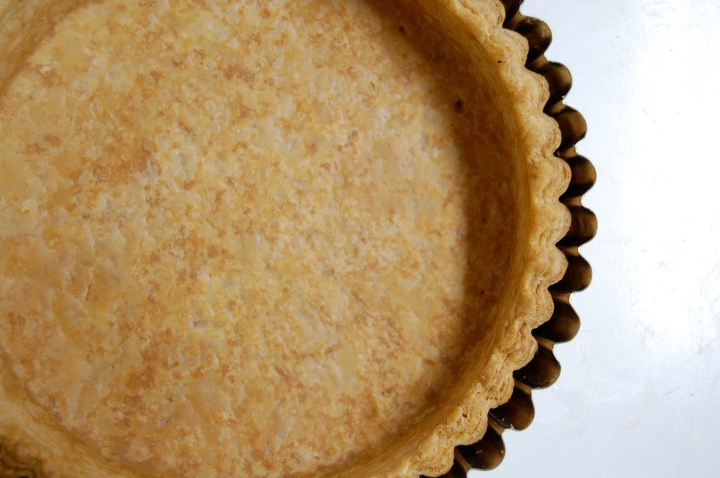
While the crust was cooling I prepared my first layer, the pumpkin custard. This recipe (Sherry Yard, 2 for 2!) called for pumpkin purée, spices, sour cream, egg and cream.

I baked the custard in the crust until it set.

I let that cool and then whipped some cream, crème fraîche and maple syrup until it was pretty stiff. I spread that on the custard layer and popped it in the fridge to chill while I got to work on the 3rd layer.

I started by making a caramel.
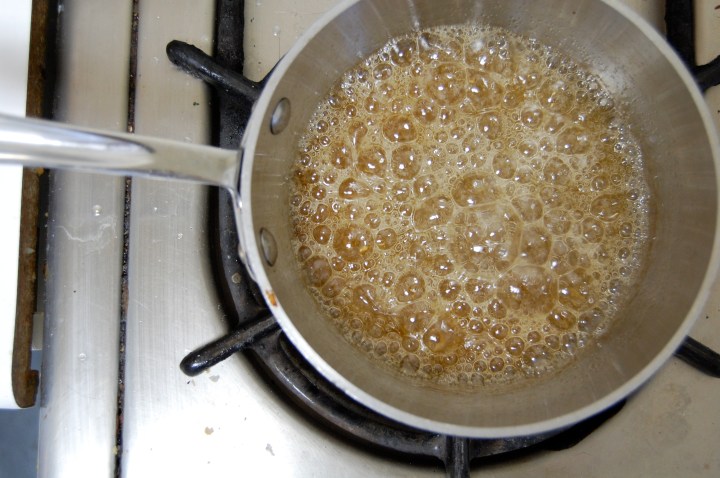
I mixed spices, brown sugar, pumpkin purée and gelatin into the caramel and let it cool.

Then I whipped up some meringue and cream, folding each into the caramel mixture to form the mousse.

I topped the pie with the mousse and let it chill some more in the fridge. Sadly, I don’t have a picture of the slice, so you can’t see all the pretty layers (another reason to make it yourself!). Once unveiled, this pie didn’t stand a chance of surviving PreThanksgiving Day intact.

TRIPLE SILKEN PUMPKIN PIE RECIPE (Sherry Yard):
Pumpkin custard layer:
Dough for 1 (9-inch) pie crust
1/4 cup sugar
1/2 teaspoon ground ginger
1/2 teaspoon ground cinnamon
2 eggs
1/2 cup dark brown sugar
3/4 cup pumpkin puree
1/2 cup sour cream
3/4 cup heavy cream
2 tablespoons brandy
– Roll out pastry into a 12-13 inch circle, transfer and center into 9 inch deep dish pie pan. Trim edges and place in freezer for 20 minutes.
– Line with foil, fill with weights (dried beans) and then bake in 400 degrees oven for about 20 minutes, or until beginning to brown and look set. Lower temperature to 350 and cook for another 15 minutes. Remove foil and beans and continue baking for another 10-20 minutes, until fully baked. Set on wire rack to cool.
– Heat the oven to 325 degrees. In a medium bowl, whisk together the sugar, ginger and cinnamon. Add the eggs and whisk until smooth. Whisk in the brown sugar, pumpkin, sour cream, heavy cream and brandy.
– Pour the mixture into the springform pan on top of the cooled pastry. Cover the pan with buttered aluminum foil and bake until the custard is just set, about 1 hour.
– Remove from the oven and cool at room temperature.
Whipped cream layer:
3/4 cup heavy cream
1/2 cup creme fraiche
2 teaspoons sugar
2 teaspoons maple syrup
– Combine the heavy cream and creme fraiche in a large mixing bowl and beat until it starts to thicken and swell. Add the sugar and maple sugar and continue beating until stiff.
– Spread in an even layer on top of the pumpkin custard and refrigerate.
Caramel pumpkin mousse:
1/2 cup heavy cream
2 tablespoons brown sugar
1/2 teaspoon ground cinnamon
1/2 teaspoon ground ginger
3/4 cup sugar
4 tablespoons water
1/2 teaspoon lemon juice
1 1/2 teaspoons gelatin
3/4 cup plain pumpkin puree
3 egg whites
1/8 teaspoon cream of tartar
3 tablespoons sugar
– Place 2 tablespoons water in a small bowl and sprinkle the gelatin over the top. Stir, then let it sit for 1 minute.
– Combine the brown sugar, cinnamon and ginger in a mixing bowl. In a heavy saucepan, combine the 3/4 cup sugar, 2 tablespoons water, and the lemon juice and cook over high heat until the mixture turns a caramel color.
– Remove the caramel from the stove and stir the brown sugar mixture into it. Add the softened gelatin and stir to dissolve. Whisk in the canned pumpkin and set aside to cool.
– Whip the cream until it forms soft peaks. Chill in the refrigerator until ready to use.
– Using an electric mixer, beat the egg whites until they foam. Add the cream of tartar. Continue to beat, adding the remaining 3 tablespoons of sugar in a slow, steady stream. Beat until the egg whites are stiff and shiny, about 2 minutes.
– Lighten the warm pumpkin mixture by folding in one-third of the beaten egg whites. Pour the remaining egg whites over the top and carefully fold them into the pumpkin mixture using a rubber spatula. Fold in the whipped cream.
– Carefully pour the mixture over the whipped cream layer and smooth the top. Refrigerate for 2 hours until set.
8. To serve, gently unmold the pie from the pan and set it on a plate. Garnish with additional whipped cream if desired.
Seattle, Here We Come!
So if we’re friends in real life (or facebook life) you’ve probably already heard the news. For those who haven’t – We’re moving to Seattle! It’s all very sudden and at this point we’re scrambling to keep up with our plans. 2 weeks ago I took a girls’ trip to Seattle with some close friends and met the fabulous super-couple Brandon Pettit and Molly Wizenberg. They just opened a tiny little pizzeria called Delancey, in the Ballard neighborhood of Seattle. So far so good: the locals are loving the pizza and there’s a wait for a table most every night. Brandon has been working the pizza oven while Molly has been handling the dessert station, where she’s been slinging her infamous salted chocolate chip cookie. Since Molly has been itching to get back to her writing, they hired me to take over the desserts! So December 1st me and John (and Bean) will call Seattle our home!
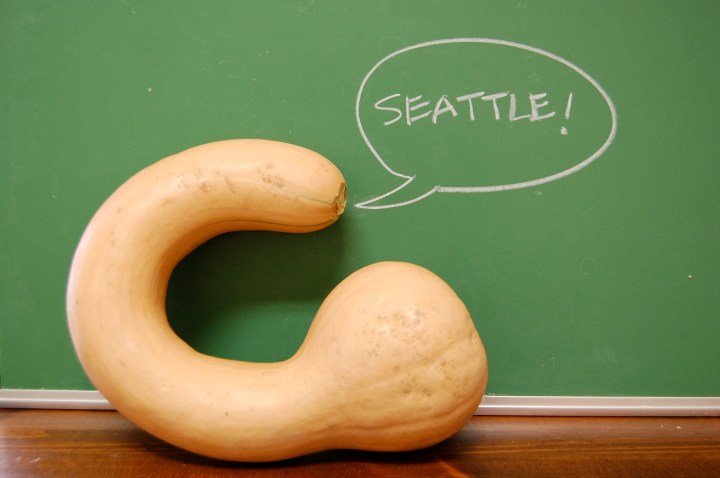
I included this pic of the coolest butternut squash EVER to exemplify one of the things I will miss most (besides all of our amazing friends who had better be flying up regularly visit us!) about the Bay Area: our food. I’ve received a CSA box for the past 2 years and have loved every second of it, even when we have a line of uneaten watermelons down the hallway. I know the seasons are different up there, and it’s gonna be a challenge learning a new food system, but I am so excited. I’ll probably pass on the geoduck, but in the Spring I’ll be awash in rhubarb! And the cherries! And all those heritage apples! It’s gonna be so awesome, I promise.






10 comments