Because some things just need to be shared.
Something happened this week. I was teaching a class on enriched breads, and had spent weeks testing and testing to get everything perfect. There was pain de mie, beautiful braids of challah, petit brioche a tete, and lots of parker house rolls. When I envisioned the class, I pictured mountains of breads, which I personally found very appealing. But I was worried that people wouldn’t think it was exciting enough. I needed some intrigue. A wild card. Something to get people in the door. I needed cinnamon rolls.

I’ll be honest, two weeks ago I was pretty ambivalent about cinnamon rolls. Sure, they were nice. I mean, who’s going to complain about swirly squishy bread covered in cinnamon and frosting? But I had never had my mind blown by a cinnamon roll. Cinnabons are pretty good, I guess, but I can literally taste the chemicals on my tongue after attempting to eat one of those. Weirdly enough, when I was thinking back to formative cinnamon bun years, they seemed to revolve around those canned ones at the grocery store that you ice yourself and aren’t even swirly. A dressed up version of those, that was the cinnamon bun of my dreams. So with that weird little canned bun in mind, I set about developing a recipe.
It only took about four tries. It helped that I already had the dough worked out from the sticky pecan buns that I taught last summer (aaaah, another blog post that I started and never finished…sigh). It was all about getting the flavors right. And I’m pretty sure I nailed it. I’m also pretty sure that in those four days of trying, followed by four days of teaching and baking the rolls, I transitioned from an ambivalent cinnamon roll passer-by to a full fledged devotee. Around day 6 I started dreaming about them. Then I started seeing them everywhere: coasters, camera lenses, even my cat all rolled up while sleeping started looking like a cinnamon bun that I really, REALLY wanted to nibble on (as if I actually eat them that daintily). It was all I talked about on facebook, prompting some recipe requests, which made me think: “hey, I know what I haven’t done in a while: a blog post!” So here I am, sharing these rolls, because dammit, they are worth breaking my four-month blog pause to share. Enjoy.
Cinnamon Rolls:
Yield: 12 rolls
Dough:
12 ounces bread flour
1 1/2 tablespoons sugar
1 1/2 teaspoons instant yeast
1/2 teaspoon kosher salt
3 ounces whole milk, lukewarm
3 large eggs, room temperature
1 egg yolk, room temperature
6 ounces unsalted butter, soft
Cinnamon Filling:
5 ounces brown sugar
5 teaspoons cinnamon
1/4 teaspoon kosher salt
3 ounces unsalted butter, soft
Cream Cheese Glaze:
2 1/2 ounces cream cheese, soft
2 ounces unsalted butter, soft
3/4 cup powdered sugar
1/4 teaspoon kosher salt
1/2 vanilla bean or 1/2 teaspoon vanilla extract
1 tablespoon milk
Make the dough:
– Stir together the flour, sugar, yeast and salt in a stand mixer bowl (or large mixing bowl). Combine the milk and eggs in a separate small bowl. Pour the egg mixture in the dry mixture and stir until smooth. Let this mixture rest for about 5 minutes so that the gluten can begin to develop.
– One piece at a time, knead in the butter, waiting until each addition of butter assimilates before adding more. This will take a few minutes. Continue mixing for about 6 more minutes, or until the dough is very well mixed. You will have to scrape down the bowl from time to time as the dough will cling to it. The dough will be very smooth.
– Place the dough in a large bowl. Cover the pan with plastic wrap. If making that day, place in a warm spot to rise. Once risen, place in the fridge to chill before rolling, As cold dough is much easier to work with. If making in advance, put the dough into the refrigerator and chill overnight, or for at least 4 hours.
Assemble the buns:
– Mix together the cinnamon, sugar and salt and set aside.
– On a floured work surface, roll out the brioche into rectangle about 12 by 16 inches and 1/4-inch thick. It should be fairly easy to roll. Position the rectangle so a long side is facing you. Spread the soft butter evenly over the entire surface of the dough, then sprinkle on the cinnamon sugar mixture. Starting from the side closest to you, roll up the rectangle like a jelly roll. Try to roll tightly, so you have a nice round spiral. Trim off about 1 inch from each end of the roll to make them even. If at any point the dough becomes warm or sticky, place it in the fridge to chill for 10 minutes.
– Use a bench scraper or knife to cut the roll into 12 equal pieces, each about 1 1/2-inches wide. At this point, the unbaked buns can be tightly wrapped in plastic wrap and frozen for up to 1 week. When ready to bake, thaw them, still wrapped, in the refrigerator overnight or at room temperature for 2 to 3 hours, then proceed as directed.
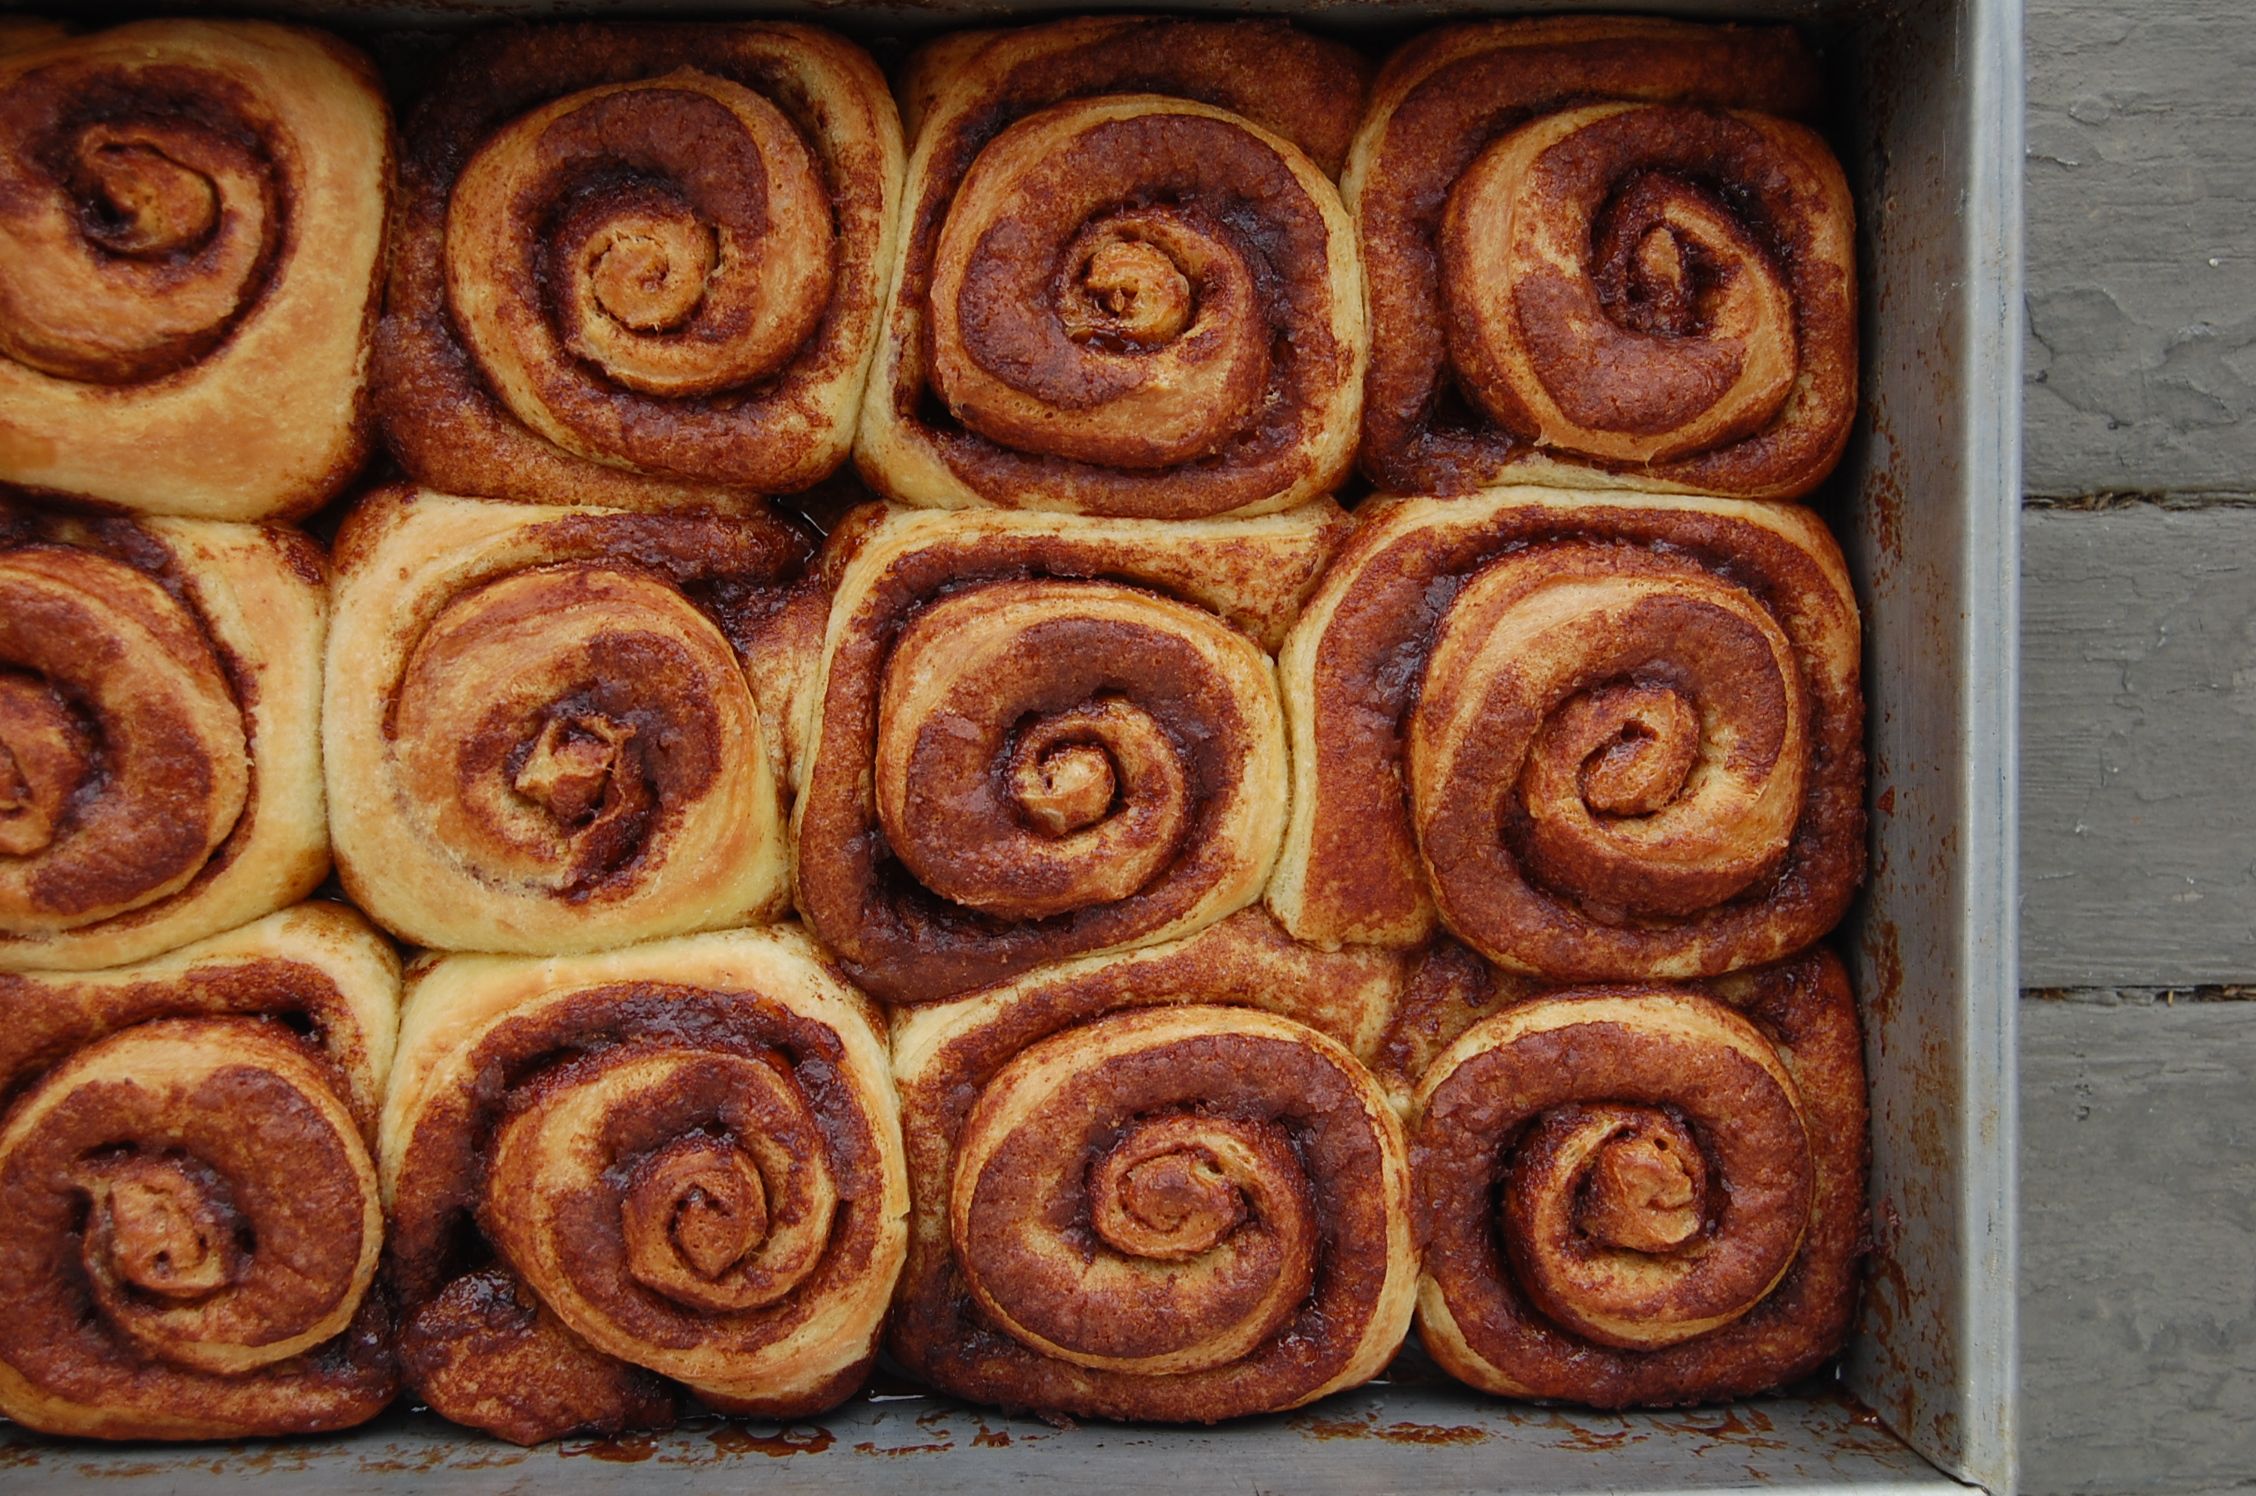
– Butter a 9”x13” baking pan. Arrange the buns, evenly spaced, in the pan. Cover with plastic wrap and put in a warm spot to proof until the dough is puffy, pillowy, and soft and the buns are touching-almost tripled in size, about 2 hours.
– Position a rack in the center of the oven, and heat to 375 degrees. Bake until golden brown, about 20 to 25 minutes. While the cinnamon rolls are baking, prepare the glaze.
Glaze the buns:
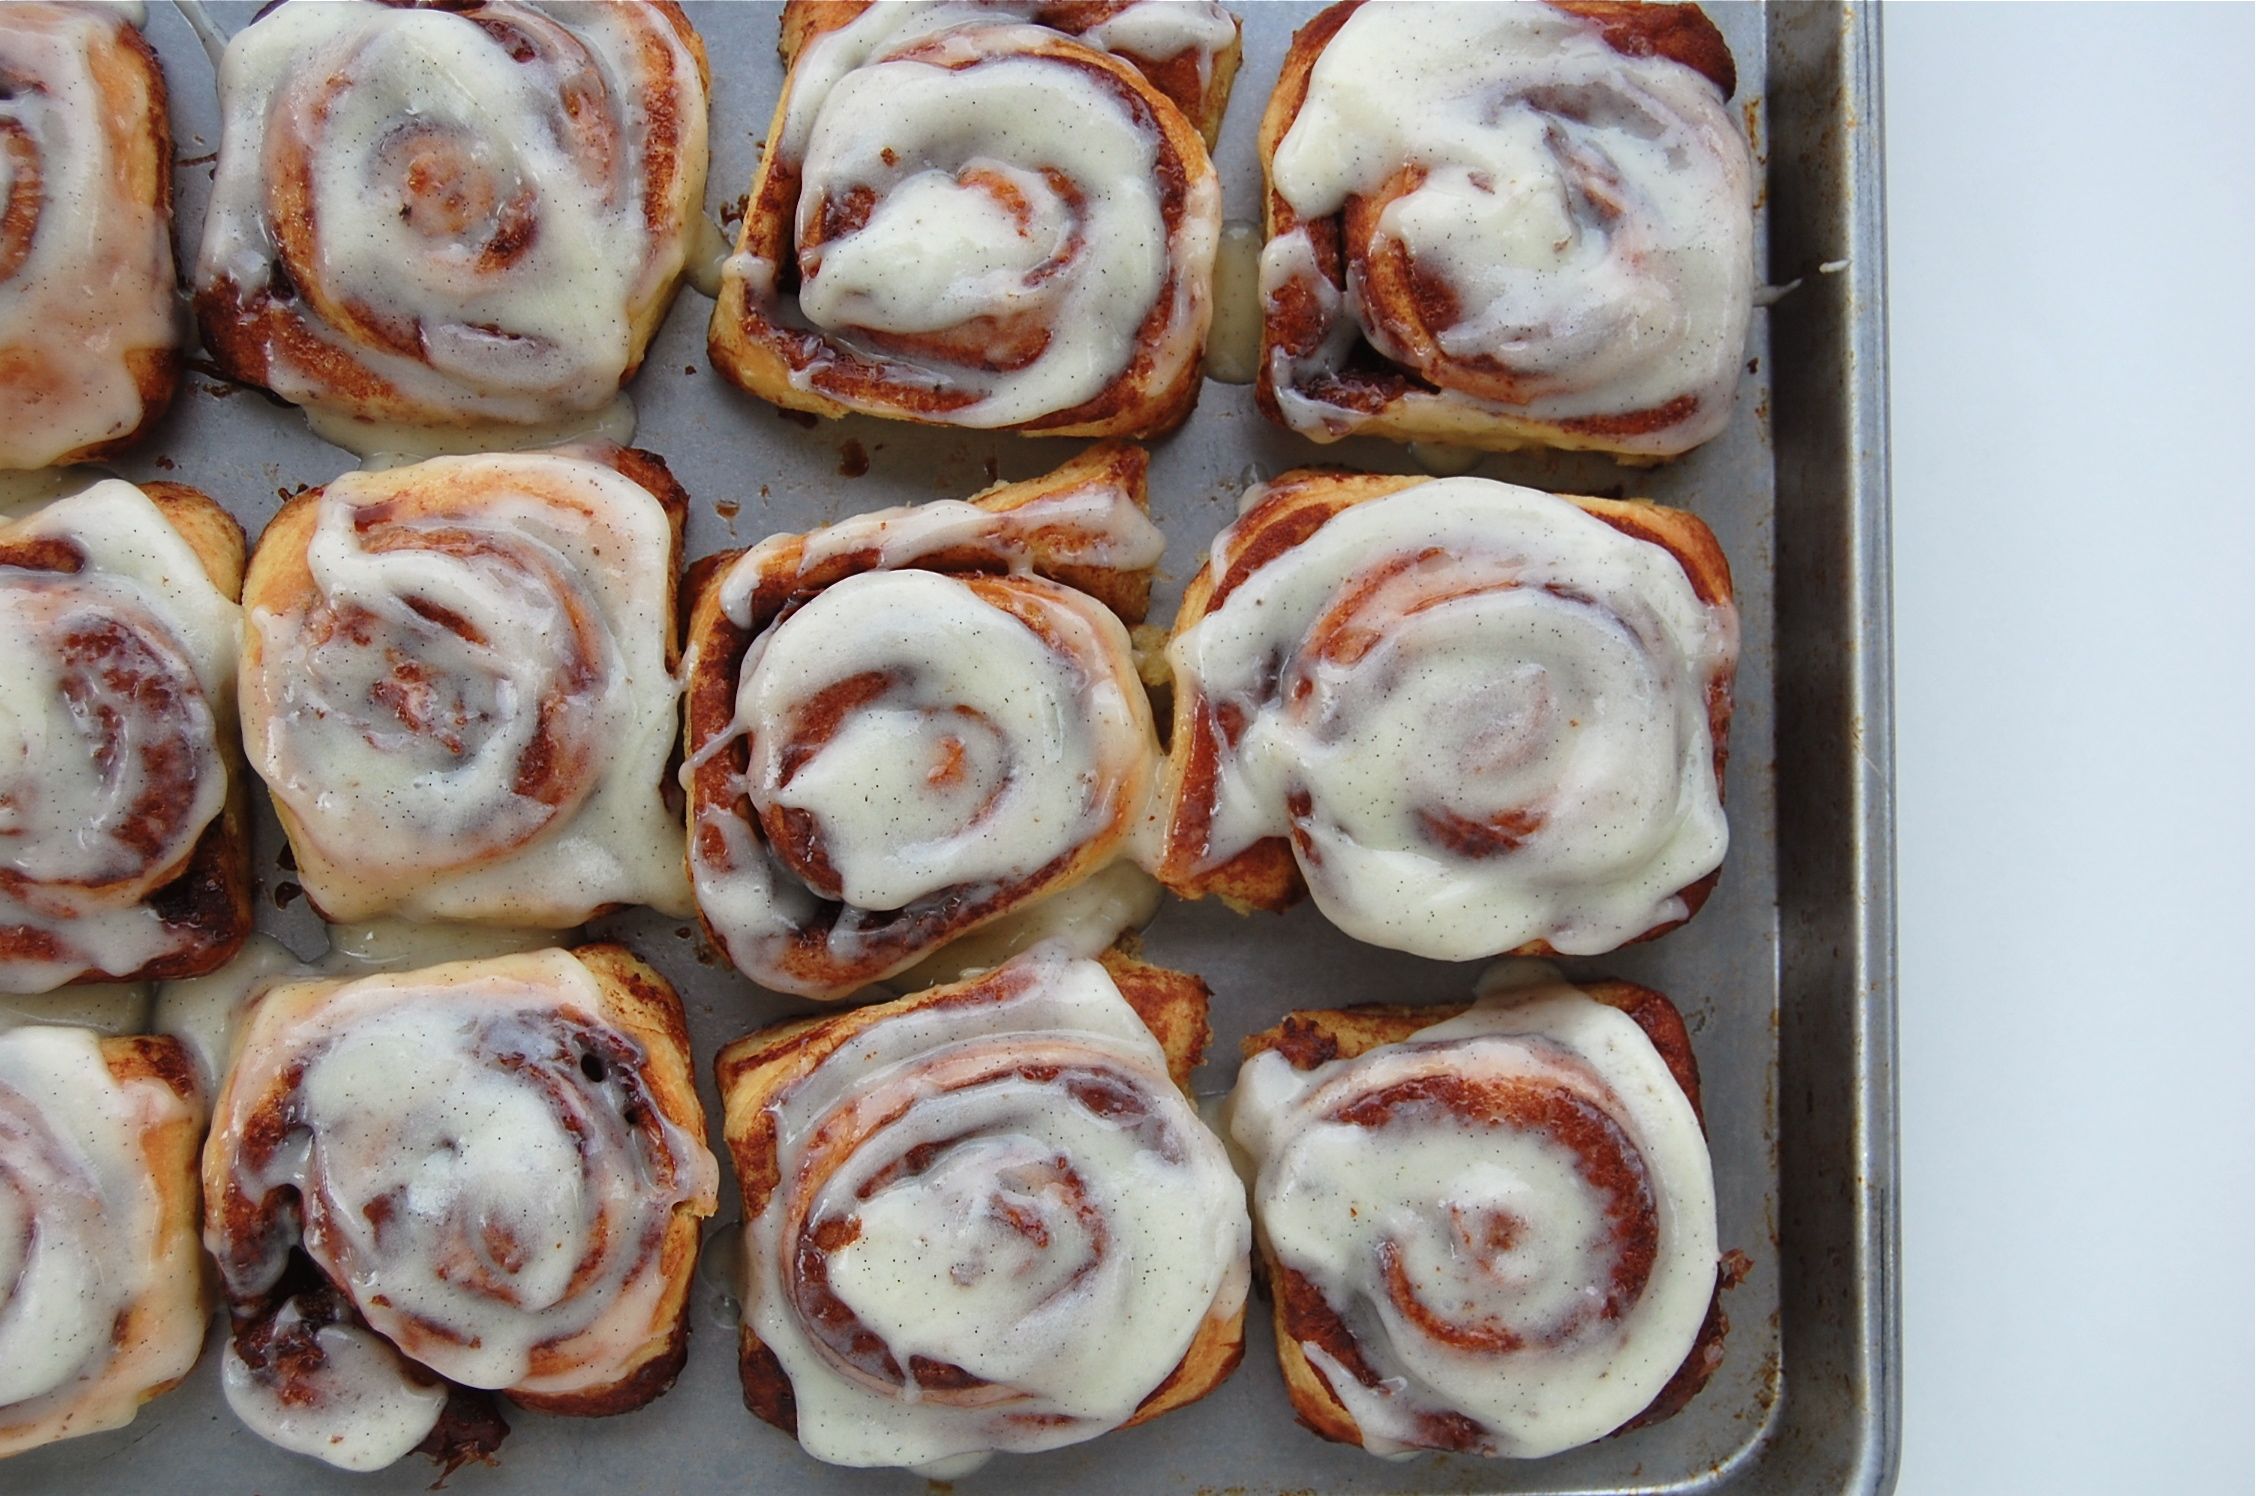
– Whisk together all of the glaze ingredients until smooth.
– When the cinnamon rolls are finished baking, you can decide whether to glaze them warm or after they’ve cooled. One at a time, invert the buns onto a wire cooling rack. Spread the glaze onto them, you will have more than enough.
How to picnic like it’s your wedding day.
So this year was a big one for me. The Pantry turned one, I finally went to Canada, and after dating for 6 years, me and John got married.
I know, I know: A) this post is over due (sorry, yet again!) and B) It’s frickin’ Thanksgiving, all you want to hear about is another variation on sweet potatoes and brussels sprouts. But think of this as a holiday oasis post, a place you can come to forget about the will-it-EVER-stop rain (if you live in Seattle) and instead remember summertime, picnic blankets, sundresses and adorable foods on crackers.
It was a gorgeous August weekend in the Cascade Mountains, 80 degrees and sunny, with the crisp waters of Lake Wenatchee a five minute drive away. It was a weekend filled with friends, singing, dancing, and of course, whole lot of food.

I was never going to be a traditional bride — white ball gowns and pretty pictures of me gazing into the sunset are definitely not my thing. And I’ve got plenty of political ideas about marriage and taxes and civil rights that have kept me from taking the idea of a wedding seriously for most of my life. It really took a mental shift, reframing the idea of a wedding ceremony to get me on board. It doesn’t have to be about poofy dresses and until sickness and death parting us, or about weird beef dishes from the 60s and the electric slide. It can be about friends. And our rather tiny families. And celebration. And where there’s celebrating, there’s food. And board games. And lawn games. And a lemonade stand. And midnight re-enactments of frogger with hacky sacks. And karaoke with lots of dancing.

Since so many of our guests were coming from far away, we wanted the wedding to to take over a weekend, giving us as much quality time as possible — and, of course, providing us with plenty of opportunities for meals.
I like to dream big, and I’ve never met a culinary challenge that was too intimidating. So as you can imagine, the days leading up to the wedding were slightly insane. I am forever indebted to all my friends who spent many hours cooking, pickling, packaging, and labeling all the food that would become welcome snacks for our guests, breakfast baskets that got delivered to everyone’s cabins, and finally make it into the main event: a wedding picnic in the mountains.

We spent months scavenging for picnic baskets, vases and picture frames at the thrift stores, and then painted them all bright aqua blue. We filled them with all of our favorite things, and sewed napkins, streamers and pillows out of vintage fabric I found at my great-grandmother’s house in Alabama. Actually full credit for napkin sewing goes to Mariah, my close friend and inspiration for all things domestic, because she didn’t even blink when I dropped a box of vintage fabric on her porch before hopping on a plane back to Seattle. It was not a white wedding. It was bright. It was patterned. And nothing matched. It was perfect.

We had olives marinated with rosemary, orange and chile flakes, and herb roasted nuts.

A tuna salad with tarragon, fennel and celery leaves, concocted by my business partner Olaiya Land, that pretty much stole the show.

Some Olympic Provisions salami and our favorite cheeses: Cowgirl Creamery’s Mt. Tam and Jasper Hill’s clothbound cheddar.

Pickled cucumbers with fennel fronds and some red pepper jelly that my family is still asking about.

Smokey baba ganoush, which I think is responsible for keeping me fed the entire weekend, and a white bean and kale salad dressed with a preserved lemon vinaigrette, recipe courtesy of our friends at Picnic.

And since I’m a pastry chef and John has an unrivaled sweet tooth, there was plenty of dessert: lemon pound cake and my most favorite banana bread ever, and rhubarb ginger jam made by Rebecca of Deluxe Foods. Three days before the ceremony I let go of the plan to make homemade nutella. It was the right decision.

I still think about that weekend. Having everyone with us, being able to feed them. Swimming in the lake, playing kickball in the sun, eating dinner under the stars – I can’t even imagine a different kind of wedding. Thank you to all of my friends, for being there and for being so awesome. And a special thank you to Gabe and Ashley Rodriguez, for taking such beautiful pictures that will make me remember that weekend in visual style.

Marinated Olives w/ Rosemary, Orange & Chile
8 cups caselvetrano olives
4 cups olive oil
4 oranges
4 six-inch sprigs rosemary
1 tsp chile flakes
8 garlic cloves
– Using a vegetable peeler, remove zest from orange in long, wide strips. Smash garlic cloves with the edge of a chef’s knife.
– Place the olive oil in a small saucepan along with the orange zest, rosemary, pepper flakes and garlic. Warm over medium heat until fragrant but not boiling or simmering. Turn heat to medium-low and add olives. Stir occasionally for about 5 minutes. Do not cook olives. Pour olives and oil into serving dish and accompany with crusty bread for dipping in the oil.
—————————
Roasted Mixed Nuts
8 oz pecans
8 oz cashews
8 oz almonds
6 oz hazelnuts
6 oz walnuts
1/4 cup chopped rosemary
1 tsp cayenne pepper
4 tsp dark brown sugar
4 tsp Maldon salt
1 oz butter, melted
-Preheat the oven to 350 degrees F.
-Toss the nuts in a large bowl to combine and spread them out on a baking sheet. Toast in the oven until light golden brown, about 10 minutes.
-In a large bowl, combine the rosemary, cayenne, sugar, salt and melted butter.
-Thoroughly toss the toasted nuts in the spiced butter and serve warm.
—————————-
Tarragon Tuna Salad
15 oz good tuna in oil, w/oil (I like Tonno brand)
3 TBSP chopped tarragon
2 tsp chopped parsley
1/2 cup finely diced fennel
1 stalk celery, finely sliced
1/4 cup minced red onion
2 TBSP lemon juice
1/2 cup loosely packed celery leaves
1/4 cup mayonnaise
Freshly ground black pepper, to taste
Kosher salt, to taste
Pinch sugar, to taste
– Break the tuna into rough chunks.
– In a medium bowl, combine all the ingredients except for the salt, pepper and sugar. Mix gently, to combine. Season with a generous amount of black pepper and a pinch of salt and sugar, if needed.
———————————
Red Pepper Jelly
1 1/2 lb red bell peppers, cut into 1-inch pieces
1 TBSP red-pepper flakes
1 tsp smoked paprika
3 TBSP Sure-Jell less- or no-sugar-needed pectin
3 1/4 cups sugar
1 cup white-wine vinegar
1 TBSP unsalted butter
3/4 tsp kosher salt
– Pulse bell peppers with red-pepper flakes and smoked paprika, if using, in a food processor until finely chopped. (Mixture will measure about 2 1/2 cups.)
– Whisk together pectin and 1/4 cup sugar in a small bowl.
– Stir together pepper mixture, vinegar, butter, salt, and remaining 3 cups sugar in a 5- to 6-quart heavy pot. Bring to a vigorous boil over high heat, then continue to boil vigorously, stirring occasionally, 5 minutes. Gradually add pectin mixture, whisking constantly. Return jelly to a vigorous boil, stirring constantly, and boil, stirring constantly, 1 to 2 minutes (mixture will thicken slightly). Remove from heat.
——————————–
Best Banana Bread Ever
1 lb peeled, very ripe bananas
9 1/2 oz sugar
1 vanilla bean
5 1/4 oz melted butter
2 eggs
7 1/2 oz AP flour
1 1/2 tsp baking soda
1 tsp kosher salt
– Preheat the oven to 350 degrees (325 conv.). Butter loaf pans and line with parchment. Set aside.
– Rub the vanilla bean seeds into the sugar to make a vanilla sugar. Beat bananas and sugar well with paddle, then add the butter slowly.
– Add the eggs one at a time.
– Sift the dry ingredients and then add.
– Spoon into the prepared cake pans and bake until the cakes spring back when touched lightly in the center. Cool before removing from the pan.
One more apple cake before spring
I know it’s spring. I know that rhubarb is popping up around town and the last thing you want to hear about is apples. But I’ve got to get this one out before it completely slips away, because this is the cake I want to eat every day. The original recipe came from Dorie Greenspan and took a few tweaks to get to the place I really wanted it to be. We served it at our apple harvest dinner in November, but it took me until the final night of the dinner before it was just right. And by just right I mean the cake I’ve had in my mind for years now, with the hopes of one day discovering (thank you Dorie, for getting me so close). It has a crispy, caramelized crust and a custardy, pancake-like inside that’s held together by giant chunks of sweet apples. We had it on the menu at Delancey for a month or so, with a dark vanilla bean caramel and a healthy sprinkling of Maldon salt, and it was a bit dangerous having it around all the time. It wasn’t our biggest seller, I’m assuming because it shared the menu with some of my more popular citrus desserts. But that secretly made me so happy, since it meant there was commonly a slice left over for me at the end of the night. And now that we’re switching over to rhubarb shortcakes, I miss that little cake. But the good news is that it’s a batter that can literally be whipped together in under 15 minutes.

It bakes for a while though, about an hour to develop that crust and slightly dry out the custardy interior.

Probably the hardest part is waiting for it to cool, since it has this habit of falling completely apart if you un-mold it too soon.

APPLE CUSTARD CAKE:
3.75 oz AP flour
3/4 tsp baking powder
1/4 tsp kosher salt
1 lb 2 oz chopped apples
2 large eggs, room temperature
6 oz sugar
1/2 vanilla bean
3 TBSP apple cider
4 oz unsalted butter, melted
unrefined sugar for sprinkling
– Preheat the oven to 350 degrees. Generously butter an 8-inch springform cake pan and line it with parchment paper. Sprinkle unrefined sugar on the sides of the pan and tap it around.
– Whisk the flour, baking powder, and salt together in small bowl.
– In a medium bowl, beat the eggs with a whisk until they’re foamy. Rub the vanilla bean seeds into the sugar and add to the eggs. Whisk until well blended. Whisk in the apple cider. Whisk in half the flour and when it is incorporated, add half the melted butter, followed by the rest of the flour and the remaining butter, mixing gently after each addition so that you have a smooth, rather thick batter. Switch to a rubber spatula and fold in the apples, turning the fruit so that it’s coated with batter. Scrape the mix into the pan and poke it around a little with the spatula so that it’s even. Sprinkle the top of the cake with unrefined sugar.
– Slide the pan into the oven and bake for 50 to 60 minutes, or until the top of the cake is golden brown and a knife inserted deep into the center comes out clean. Transfer to a cooling rack and let rest for 30 minutes.
– Carefully run a blunt knife around the edges of the cake and remove the sides of the springform pan. Allow the cake to cool until it is just slightly warm or at room temperature. If you want to remove the cake from the bottom of the springform pan, wait until the cake is almost cooled, then run a long spatula between the cake and the pan, cover the top of the cake with a piece of parchment, and invert it onto a rack. Carefully remove the bottom of the pan and turn the cake over onto a serving dish.
– Eat with a generous dusting of Maldon sea salt. And caramel and whipped cream if you’ve got it.
On being boring.
Ummm… hi?
So yeah, it happened. I fell into the hole that is now The Pantry. What can I say besides that I’m sorry? You see, the thing is, I LOVE my new hole. I obsess. I make spreadsheets. I organize. I reorganize my spreadsheets. Owning a business has been amazing (how did I ever have a boss?), but I think it is fair to say that I am getting my butt kicked. In a masochistic kind of way. In fact, if we’re being honest, the only reason I am here, writing this very post, is because I’m fighting off a cold that is forcing me to remain horizontal, wrapped up in a down comforter, watching episode after episode of Glee, with a sprinkling of a good documentary to break up all that nauseatingly addictive singing (did you know that the Mormon church bankrolled Prop. 8? And that becoming a Green Beret is quite torturous?) Anyhoo, either way, here I am. Oh yeah, and I got this comment on my blog a week or two ago:
“I aM DELETING YOU FROM MY FAVORTIES. u r BORING AND DO NOT POST ON YOUR BLOG. YOU SHOULD NOT HAVE A BLOG!!!!!”
While I admit that this one had me chuckling for a few hours (boring? really?), it did remind me that I have been sorely neglecting my blog. I thought about posting an apology, including an adorable picture of Bean to make you all forget my negligence.

But that didn’t feel right. Not there’s anything wrong with cute cat pictures, I just promised myself when I started this whole blogging hobby that I wouldn’t post unless I had something that I’m really proud of. There has been some great cooking, but unfortunately no time to document. I’ve always felt this to be a blog more about technique than recipes, so I didn’t want to just throw a recipe at you without really digging in. But I can see now that those days of spending many hours meticulously collecting photos of every step of super-elaborate recipes are getting fewer and farther between.

So I’m here with a compromise. I’m short on process photos, but I’m making up for it with a recipe that I firmly believe will knock your socks off. It’s a maple walnut trifle, and I seriously think about it nonstop. Think toasted walnut cake, cut into bite-sized cubes. A creamy and intense maple fluff. Crunchy candied walnuts and Maldon sea salt. It is my personal bowl of heaven. I developed it, along with Stephanie, my pastry chef in training, for the dessert menu at Delancey. We hosted a dinner for Sam Mogannam to celebrate his new book, and we served it family-style in giant trifle dishes (I later found out that Sam is allergic to walnuts and yes, I cried a little on the inside). I suspect that I will be serving it at Christmas dinner this year. It is that good.

Quick note: Sheet gelatin can be tricky to find, but it’s available online. I dramatically prefer it to powdered gelatin.
Maple Walnut Trifle
Toasted Walnut Cake:
4 ounces walnuts
4 ounces brown sugar
1/2 vanilla bean
4 ounces cake flour
1 teaspoon baking powder
1/4 teaspoon kosher salt
1/4 cup milk
2 tablespoons canola oil
2 tablespoons maple syrup
4 ounces unsalted butter, room temperature
2 large eggs, room temperature
– Preheat the oven to 350º. Butter an 8″ cake pan and line with parchment. Set aside.
– Spread the walnuts on a sheet tray and bake until lightly toasted. Cool completely.
– In a small bowl, rub the seeds from the vanilla bean into the brown sugar. Set aside.
– In a medium bowl, whisk together the flour, baking powder, and salt. Sift and set aside.
– In a small bowl whisk together canola oil, maple syrup and milk. Set aside.
– Place the cooled, toasted walnuts in a food processor and grind until they are the size of bread crumbs. Do not pulse them into a paste.
– Place the butter in the bowl of a stand mixer. Using the paddle attachment, cream the butter on medium speed until smooth. Add the brown sugar. Cream the mixture on medium speed until pale and fluffy, about 3 minutes. Add the eggs one at a time, mixing thoroughly before adding the next and scraping down the bowl after each addition. Beat for another minute. Reduce the speed of the mixer to low and add the ground walnuts.
– With the mixer running on low, add a third of the flour mixture. Mix until just combined and then add half of the milk mixture. Repeat with another third of the flour, then with the rest of the milk mixture, ending with the rest of the flour mixture.
– Spoon the batter into the prepared cake pan and bake until done. The baked surface will spring back slightly when touched in the center and the sides will begin to contract from the pan. Remove the cake from the oven, and let cool before removing from the pan.
14 ounces grade B maple syrup
5 1/2 gelatin sheets
16 egg yolks
1/4 teaspoon kosher salt
3 cups heavy cream
– In a medium saucepan, reduce the maple syrup by 25% over med-high heat for 5-7 minutes (it will bubble a lot). The resulting weight should be approximately 11 ounces. Set aside to cool.
– Fill a large pot halfway with water and bring to a simmer.
– Place the sheet gelatin in cold water until it is completely squishy, about 5 minutes. Remove from the water and shake off the excess liquid. Set aside.
– Whisk together the cooled maple syrup, salt and egg yolks in a metal bowl. Cook over the pot of simmering water, whisking constantly until the mixture registers 165º F. Remove the bowl from simmering water and stir in the drained, bloomed gelatin sheets. Pour the mixture through a fine mash strainer, into a clean medium bowl. Set aside to cool, whisking every few minutes. You can either place the mixture over an ice bath, or pop it in the fridge. It is very important to check in with a stir every few minutes, to keep the edges from setting to quickly. The goal is to have the mixture set to being equal in stiffness to whipped cream.
– Beat the cream to stiff peaks. Fold in a third of the cream into the cooled maple mixture, to lighten it. Gently fold in the rest of the whipped cream until just barely mixed. Pour into a container and refrigerate until set, about 2 hours.
Assembling the Trifle:
– Cut the cake into large cubes and fill the bottom of a trifle dish. Just before serving, pour on the maple mousse.
– Top with candied walnuts, a drizzle of maple syrup and some maldon sea salt. Enjoy.
Introducing the Strawberry Cake
There’s no getting around the fact that strawberries make things pink, which given my obsession with all things strawberry flavored, inherently makes me a sucker for pink food. But there’s one pink food that totally beats all the other pink food out there: strawberry cake. It’s a southern staple, a cake I hunt for every time I’m in Alabama. I’ve been perfecting my recipe for several years, but was waiting to share it until after teaching it in my Southern Cakes class at The Pantry (so much fun!). And it was hard keeping it to myself. Especially after a certain magazine that shall remain nameless (shame on you!) printed a particularly icky version (strawberry extract? gross!). But the truth is, like most southern cakes, this cake comes from a humble place. Try finding a great recipe online and it’s easy to be turned off by the miles of recipes calling for yellow cake mix and strawberry jello. Hence the several years… But alas! I can now have my pink cake and eat it too.
It starts with a bright batter flecked with puréed strawberries.

And ends with layers of perfect strawberry cream cheese frosting.

Now go find yourself an 8 year old girl’s birthday party, while there’s still one more week of strawberries at the market!

SOUTHERN STRAWBERRY CAKE:
Yield: 1 three layer 8″ cake
10 ounces (2 1/2 cups) cake flour
1 tsp baking soda
1/2 teaspoon kosher salt
1/3 cup buttermilk
1/4 cup canola oil
1/2 teaspoon almond extract
1/2 vanilla bean
4 ounces unsalted butter, room temperature
1 1/2 cups sugar
2 large eggs, room temperature, beaten
1 cup pureed strawberries
1 teaspoon lemon zest
– Preheat the oven to 350 degrees. Butter three 8” cake pans and line with rounds of parchment. Set aside.
– In a medium bowl, sift together the flour, baking soda, and salt. Set aside.
– In another medium bowl, combine the buttermilk, oil, and almond extract. Set aside.
– Split and scrape out the seeds from the vanilla bean. Rub the seeds into the sugar. In an electric mixer, beat the butter and vanilla sugar with the paddle attachment until it forms a paste. Add the eggs in a slow stream, beating well after each addition. Beat for 1 minute at medium speed. Gradually add the buttermilk mixture and beat for 1 minute at medium speed.
– Reduce the speed to low and add the flour mixture. Mix until just combined. Stir in the pureed strawberries and the lemon zest.
– Spoon into the prepared cake pans and bake until the cakes spring back when touched lightly in the center. Cool before removing from the pan.
STRAWBERRY CREAM CHEESE FROSTING:
1 pound cream cheese, room temperature
6 ounces unsalted butter
1 cup powdered sugar
6 tablespoons strawberry jam
1 teaspoon vanilla extract
2 teaspoons∑ lemon juice
1/4 teaspoon kosher salt
– In the bowl of a stand mixer with the paddle attachment, beat the butter and cream cheese on medium speed until smooth.
– Sift in the powdered sugar, and beat on low speed until incorporated. Add the strawberry jam, vanilla, lemon juice and salt, and beat well to incorporate. If the frosting is lumpy from the sugar, bump the speed up to medium-high continue beating until smooth.
The first jam of the summer
So you may have noticed that I’m not really cooking much these days. What can I say that I haven’t said in the last 4-5 posts? I miss cooking. I almost even miss stopping everyone from digging into piping hot yumminess so I can spend 5 minutes photographing it. Almost.
While I have been building and planting at The Pantry like a crazy little caffeinated person in overalls, I did manage to learn a few things about cooking while I was away from my computer. In Seattle we have a lovely jam-maker named Rebecca Staffel, who owns a company called Deluxe Foods. She’s kinda awesome (and she’s my neighbor, how lucky am I?!) and one day in May she let me hang out with her while she made her prize-winning gingered rhubarb jam. I felt like the luckiest girl in the Pacific Northwest for learning some of the tricks of the trade. Because while I’ve made a jam or two in my day, I am in no way a seasoned jam-maker. And rhubarb jam just seemed intimidating. I mean, rhubarb’s not even a FRUIT! But Rebecca broke it down for me and I went away giddy with plans for making my own batch of pink goodness. It’s been a crazy month, and I suspect it’s about to get crazier (our first event is in three weeks!). But we officially ran out of home-made jam in my fridge and well, if that’s not a kitchen emergency then I don’t know what is.
So I dropped everything yesterday and made some rhubarb vanilla jam. Whew.
I started by chopping up the rhubarb into teeny tiny bits. Like 1/8″ big bits. I rubbed the vanilla bean seeds into the sugar, and mixed the vanilla sugar (pod included) into the chopped rhubarb. I squeezed in the lemon juice and threw in the whole lemon chunks, which supplied some much needed pectin. I let the whole pile sit overnight in the fridge to get the juices out of the rhubarb.

The next morning I heated it all in my favorite pot. I kept it at a good strong simmer (is that just a boil?), stirring occasionally, until it reached its set point. This was my first time using a thermapen (Thanks for the tip on THAT one Rachel!), so I was feeling condident bringing the jam just to 220. Except then I got nervous that it wasn’t set and cooked it a bit more…hee. I ladled the hot jam into jars that had been boiling the whole time to get nice and germ-free. Once the jars of jam were lidded, I placed them on a tray and baked them for 10 minutes at 350 degrees. This is my first time “baking” them instead of processing them in boiling water, and I’m super excited at how easy it is (easy like, I can set a timer and run back to construction land and let John pull them out of the oven)!

We cracked open one of the jars last night for dessert. We just ate it with shortbread cookies and whipped cream and oh my, it is going to be a great summer.
Rhubarb Vanilla Jam Recipe:
2 lb 12 oz rhubarb, finely diced
2 lb sugar
1 vanilla bean
1 lemon, quartered and seeds removed
Pine nuts are expensive.
What a week!
Construction on my new business, The Pantry, is moving along, and I can finally see how the space is going to feel when all done. Such a good feeling. Then we released our class schedule on Monday and my “How to be a Pie Ninja” classes sold out in three days! And THEN, as if that wasn’t enough to make me blush, I wake up on Wednesday to the announcement that “I Made That” is a finalist for Saveur Magazine’s Best Cooking Blog award along with 101 Cookbooks, Lottie and Doof, Smitten Kitchen, Sprouted Kitchen and The Wednesday Chef! Seriously, my friends, I am glowing. And a little intimidated…I mean, I knew I had a few readers out there, but I don’t know how I landed in that company. All of a sudden I’m staring intensely at my photos, worried that they just aren’t up to snuff. And what recipe do you post when people are actually LOOKING? I was so scared I actually went out and bought $25 worth of pine nuts, because suddenly walnuts just weren’t good enough! I’m cracking people, I obviously can’t take the pressure. But thank you, whoever nominated me, you are a very nice person. And I mean that.
After a week like that there is only one answer: cake. And, well, I might as well put those pine nuts to good use…
So I toasted them.

And folded them into one of the weirdest cake batters I’ve ever made. It’s from the book “Urban Italian” by Andrew Carmellini, which is a book that I just love. Everything I’ve made from it has been right up my alley, and I’m excited to share this particular recipe. The book has you start with creaming the butter and sugar, and then go straight into adding all of the flour. Once all the flour is in, THEN you start adding the eggs, yogurt and lemon juice. That’s just crazy. But it worked. The cake has a beautiful crumb and it’s not too dense for my taste at all (did I mention it gets meringue folded into it? That probably has something to do with it).

It’s a simple cake, with the texture of a pound cake and a flavor that is almost savory. I made the recipe as he called for, except that I added salt, because all cakes want a little salt. And to be honest, I might add a bit more next time to make it feel even more savory. Or maybe make a salty caramel to pour over it. In fact I might just go do that right now. Certainly all that salt I just added makes it count as dinner rather than dessert, right?

Pine Nut Cake (Pinolata) Recipe (Andrew Carmellini):
cake batter:
2 cups pine nuts
1 1/4 cups sugar
1 pound (4 sticks) butter, at room temperature
zest and juice of 2 lemons
4 cups flour
2 tablespoons baking powder
1 1/2 tsp salt
4 whole eggs
3/4 cup yogurt
for the meringue:
4 large egg whites
1/2 cup sugar
– Preheat the oven to 350 degrees.
– Toast the pine nuts over very low heat in a dry saute pan until they have just begun to take on a golden color. Remove from the stove and reserve. I actually just toasted them in the oven…
– Prepare the batter
– Meanwhile, cream the sugar, butter and lemon zest together in a KitchenAid with the paddle attachment. Be sure to scrape down the sides as you go to make sure everything mixes evenly.
– When the mixture is quite smooth, add the flour and baking powder. Mix until the dry ingredients are just incorporated and then begin adding the eggs, one by one, waiting until each egg is thoroughly mixed in before adding the next. Turn the KitchenAid up to high for about 5 seconds to combine everything thoroughly, then scrape down the sides and the bottom with a spatula and mix in any bits that have failed to incorporate.
– Add the yogurt and mix in with the paddle attachment until it’s thoroughly incorporated.
– As you continue mixing, add the lemon juice and incorporate. Scrape down the sides and bottom and mix well with a spatula. Then transfer the mixture to a large bowl.
– Fold a third of the meringue into the batter using a rubber spatula to combine well. Add the rest of the meringue and fold in well until the mixture is combined. Fold in the pine nuts, reserving about 3 tablespoons for the top of the cakes.
– Brush 2 9×5 loaf pans with melted butter. Fill each loaf pan with the batter. Smooth and flatten the tops with the spatula. Sprinkle the tops of the cakes with the reserved pine nuts. I forgot to do that part. (Now I’ll never win!)
– Bake the loaves on the middle rack until you can put a knife into each and bring it out clean, about 45 minutes.
– Remove the cakes from the oven and let cool in the pans for about 30 minutes and then turn them out onto a cake rack to cool completely.
Homemade Doughnuts! Krispy Kreme style!
Now I’ve really gone and done it. I knew it was a slippery slope, but how could one resist? I’ve made doughnuts before, with mixed success. I’ve probably been the most happy with my apple fritters, but apple fritters are basically in their own category. And ricotta zeppoli, I think I’ve nailed that one. But a perfectly executed, simple glazed doughnut, now that’s a challenge. It seems to me that there are two camps of thought on the topic of glazed doughnuts (we’re talking “raised” doughnuts here), and they revolve around Krispy Kreme: you’re either with them or against them. I know this is a controversial opinion, but having grown up in the South where Krispy Kreme reigns, where staring bug-eyed at those little discs moving along their little frying oil river after church on Sunday mornings was a pinnacle experience, I am a devoted fan. Since moving to the west coast, they are much less ubiquitous, and not having a car for 14 years kept me from seeking them out, which surely kept my waistline in check. All that changes today, because now I can make them myself. Very, very dangerous indeed. I suspect I’ll be renewing my gym membership this week.
For those nervous about doughnuts, let me assure you, they are worth it. While there is a lot of waiting time, the amount of time you’re actually making effort is quite minimal. So while they’re probably not a weeknight dessert (unless your workday ends quite early), they are perfect for a day when you have other things going on in the house. You can check in on them periodically, and once you get the system down, they practically make themselves! OK, not that easy, but you know what I mean.
I started with a very wet and sticky dough.

I let it rise until it doubled in size.

Then I rolled it out and stamped pretty little shapes in it.

I let those pretty rings rise again, until perfectly puffed.

And then I fried them and glazed them. I am very excited about the vanilla glaze. Oh yes. My chocolate glaze, well, it needs some work. And since I need to take a breather from having doughnuts around ALL THE TIME, I will get back to that another day. For now, the glazed doughnut, use it wisely.

GLAZED DOUGHNUTS RECIPE:
(Makes 10 – 12 doughnuts)
2 tsp active dry yeast
1 cup whole milk
12oz bread flour, divided
3 egg yolks
2 TBSP superfine sugar
1/2 tsp salt
1/2 vanilla bean
1/4 tsp vanilla extract
2 oz butter
vegetable oil
– Heat the milk to 100 degrees. I just pop it in the microwave for about 20 seconds. Stir in the yeast until it is dissolved. Transfer to a medium bowl and add 5 1/2 oz of the bread flour. Stir until it forms a smooth paste. Cover the bowl in plastic to prevent drying out and place in a warm spot to rise. The inside of a gas oven is a great place, oven turned off of course.
– When the paste has doubled in size (about an hour, depending on the temperature of your house, it will now look more like a sponge), add it to a kitchenaid mixer fitted with a paddle attachment. Add the egg yolks, superfine sugar and salt and mix on low speed until smooth.
– Split and scrape the seeds from the vanilla bean and add to a small pot with the butter and vanilla extract. Heat just until melted. Add to the dough in the kitchenaid mixer and mix on low speed until smooth. With the mixer running, slowly add the rest of the flour, sprinkling in at the side. Keep mixing until it just comes together into a smooth dough. It will be quite wet and sticky, but should be able to hold together as one “lump” of dough. If not, add a bit more flour, one TBSP at a time.
– Brush a large bowl lightly with vegetable oil. Place the dough in the bowl and cover with plastic wrap. Place in a warm spot to rise.
– Once the dough has doubled in size, pop it in the fridge for 15 minutes. This will make it easier to roll out.
– On a well-floured surface, gently roll out the dough to about 3/8” to 1/2” thickness. Use a cutter to stamp out whatever shapes you like. Place the stamped dough on a parchment lined sheet pan, cover with plastic and allow to rise again in a warm spot.
– Once the doughnuts are almost doubled in size, begin heating 1 1/2 to 2 inches of vegetable oil in a large pot. When the the oil reaches 360º start frying the doughnuts in batches. Fry them until golden brown on each side, the total frying time will be under 2 minutes. Use tongs to flip and retrieve them.
– Allow to drain on a wire rack over a sheet tray. While still warm, drizzle with glaze. If making chocolate doughnuts, wait until they have cooled and then dip half in the chocolate glaze.
Glaze:
1 1/2 cups powdered sugar
1/2 tsp vanilla extract
1/8 tsp salt
1/4 cup milk
– Combine all ingredients in a small bowl and stir until smooth. If it is lumpy, pour it through a fine mesh strainer.
Happy Birthday Carrot Cake
I will admit that I haven’t spent much time on this post. Things are busy (are you as tired as I am of hearing me say that?), but there’s always time for a birthday cake. (Happy Birthday Katie!) This is a cake recipe I’ve been dying to post, mostly for the selfish reason that I want it available to me online whenever a cake emergency arises. So here you are, with completely unspectacular photos, a spectacular carrot cake. This cake recipe comes from Molly, who I am realizing has quite good taste in cakes. This one might possibly be the most perfect carrot cake. Moist, tender, not at all too sweet as they sometimes are. And a complete cinch to throw together.

For the frosting I tweaked Molly’s recipe a bit, because I wanted something a bit more tart and sour. So being the obvious person that I am, I added sour cream. And lots more lemon juice. This particular cake I made for my friend Katie to take to a dinner, so I didn’t even get to eat a slice. That was hard, and I will probably have to make another one all for myself.

CARROT CAKE WITH LEMONY CREAM CHEESE FROSTING
yield: 1 (8-inch) 3 layer cake
Cake:
2 cups all-purpose flour
2 tsp baking powder
2 tsp baking soda
1 tsp salt
1 tsp ground cinnamon
½ tsp freshly grated nutmeg
¾ tsp ground ginger
1 ½ cups sugar
1 cup vegetable oil
4 large eggs
½ cup unsweetened applesauce
3 cups finely grated peeled carrots
1 cup pecans, chopped
– Position racks in the top and bottom third of the oven, and preheat to 325°F. Lightly grease 3 (8-inch) round pans with butter. Line the bottom of the pans with parchment paper.
– In a medium bowl, combine the flour, baking powder, baking soda, salt, cinnamon, nutmeg, and ginger. Whisk well to blend.
– In the bowl of a stand mixer, beat the sugar and oil until combined. Add the eggs one at a time, beating well to incorporate after each addition. Add the applesauce, beating to mix. Add the flour mixture, and beat to incorporate, scraping down the sides of the bowl with a rubber spatula if needed. Add the carrots and the pecans, and beat briefly.
– Divide the batter evenly between the prepared pans. Slide the pans into the oven and bake until the cakes begin to pull away from the sides of the pan and a toothpick inserted into the center comes out clean, about 35-45 minutes. Cool the cakes in their pans on a wire rack for 15 minutes; then turn them out onto the rack to cool completely.
Cream Cheese Frosting:
1 lb cream cheese, RT
5oz butter, RT
1 cup sour cream
2 cups powdered sugar
1 tsp vanilla extract
1 TBSP lemon juice
1/8 tsp salt
– In the bowl of a stand mixer, beat the butter and cream cheese on medium speed until smooth. Sift in the powdered sugar, and beat on low speed until incorporated. Add the sour cream, vanilla, lemon juice and salt, and beat well to incorporate. If the frosting is lumpy from the sugar, bump the speed up to medium-high and beat the crap out of it.
In case you haven’t already met: The Crack Pie
So January was kind of a big month for me.
Construction for my new business, The Pantry, is in full swing. We’ve got all of the walls and ceiling ripped out of our space, and now begins the moment of building rather than destroying. We have a beautiful landscape plan (dreamed up by the talented crew at Fresh Digs), 3 sore backs’ worth of scavenged garden pavers, and lots of beautiful edibles in our future. We just launched our brand new website (check it out!), courtesy of the fantastic Wandering Works Design Co., as well as our first bit of press in Seattle Magazine. I am positively giddy. And if that weren’t enough, last week me and John took a trip to NYC, where we first met 8 years ago, and got ourselves engaged. Wow. Talk about a fun year ahead!
So to celebrate good times, as well as my trip to Momofuku Milk Bar on my first day as a fiancée, I give you the Crack Pie. If you haven’t heard of the Crack Pie, I am so happy to be the first to introduce you. Possibly the most famous slice of pie in Manhattan right now, it is a force to be reckoned with. It’s sweet. It’s salty. It’s oaty. Dare I say it’s over the top. It was exactly what was called for last night.
The crust. The crust is so much fun. It starts with a pretty straightforward oatmeal cookie dough. You press it into a sheet pan until it’s pretty thin. I actually found it a bit sticky to work with and ended up rolling it between parchment sheets.

You bake it until you have one gigantic golden brown oatmeal cookie.

Then you break it into crumbs and toss it with butter and brown sugar, to form an oat cookie pie dough.

That gets pressed into a pie pan, really tightly to prevent leaks.

Then the filling is poured in and the whole thing goes in the oven to set.

And Oh. My. It is insane. Kind of like pecan pie, without those pesky pecans. Wrapped in a crunchy oatmeal cookie. I will admit now that I made two. Friends came over last night and helped me devour the first pie. The second, well I’m regretting that one. It’s just too much crack for this little one. I suspect some staff at Delancey will be finishing it off if John doesn’t read this and hide it before I get there.

CRACK PIE RECIPE (Christina Tosi, Momofuku Milk Bar):
Oat Cookie Crust
Nonstick vegetable oil spray
4 1/2 oz unsalted butter, room temperature, divided
5 1/2 TBSP (packed) golden brown sugar, divided
2 TBSP sugar
1 large egg
3/4 cup plus 2 TBSP old-fashioned oats
1/2 cup all purpose flour
1/8 teaspoon baking powder
1/8 teaspoon baking soda
1/4 tsp (generous) salt
– Preheat oven to 350°F. Line 13x9x2-inch metal baking pan with parchment paper; coat with nonstick spray. Combine 6 TBSP butter, 1/4 cup brown sugar, and 2 TBSP sugar in medium bowl. Using electric mixer, beat mixture until light and fluffy, occasionally scraping down sides of bowl, about 2 minutes. Add egg; beat until pale and fluffy. Add oats, flour, baking powder, baking soda, and salt and beat until well blended, about 1 minute. Turn oat mixture out onto prepared baking pan; press out evenly to edges of pan. Bake until light golden on top, 17 to 18 minutes. Transfer baking pan to rack and cool cookie completely.
– Using hands, crumble oat cookie into large bowl; add 3 TBSP butter and 1 1/2 TBSP brown sugar. Rub in with fingertips until mixture is moist enough to stick together. Transfer cookie crust mixture to 9-inch-diameter glass pie dish. Using fingers, press mixture evenly onto bottom and up sides of pie dish. Place pie dish with crust on rimmed baking sheet.
Filling
3/4 cup sugar
1/2 cup (packed) golden brown sugar
1 TBSP nonfat dry milk powder
1/4 tsp salt
4 oz unsalted butter, melted, cooled slightly
6 1/2 TBSP heavy whipping cream
4 large egg yolks
1 teaspoon vanilla extract
Powdered sugar (for dusting)
– Position rack in center of oven and preheat to 350°F. Whisk both sugars, milk powder, and salt in medium bowl to blend. Add melted butter and whisk until blended. Add cream, then egg yolks and vanilla and whisk until well blended. Pour filling into crust. Bake pie 30 minutes (filling may begin to bubble). Reduce oven temperature to 325°F. Continue to bake pie until filling is brown in spots and set around edges but center still moves slightly when pie dish is gently shaken, about 10 minutes longer. Cool pie 2 hours in pie dish on rack. Chill uncovered overnight.
– Sift powdered sugar lightly over top of pie. Cut pie into wedges and serve cold.


23 comments