What I wish I was eating.
My disclaimer: I did not make these today. Nor did I make them this week. I made these sometime last year, I suspect right around this time….
I like to think of myself as a meatball enthusiast, in concept. If there was one dish that I think about more than any other, one that makes me get all warm and fuzzy at the mere mention, and yes, possibly one that I would choose as my last meal, it would be spaghetti and meatballs. I know what you’re thinking: “Wow, she must eat a lot of meatballs.” But the truth is that I almost never eat them. Hence this post. It’s the dish I always crave, yet never take the time to make. So here’s to cravings, may someone (John — are you reading this? hint, hint…) come along and fulfill them all. Well, except for the bad ones. You know what I mean.
These meatballs were a discovery by Molly Wizenberg, of Orangette fame. She spent the day with the owner of Cafe Lago, a fantastic homespun Italian restaurant in Seattle, and learned all the tricks that make meatballs special. Knowing me this past year, I probably skipped all the important stuff, so you can read about it here. In the meantime, I mixed a bunch of yummy stuff in a big bowl.

And swirled it all around.

Then I shaped it all into adorable little balls.

And into red sauce it went! Seriously though, this may be a short and sweet post, but these meatballs are fantastic. And if you happen to be a leftovers junky like myself, you will be very pleased.

Spaghetti and Meatballs Recipe:
Sauce:
2 28-ounce cans whole peeled tomatoes in juice, drained, juice reserved, tomatoes finely chopped
4 ounces unsalted butter
1 medium onion, peeled, halved through root end
1/2 teaspoon kosher salt
Meatballs:
1 cup fresh breadcrumbs
1/3 cup whole milk
8 ounces ground beef (15% fat)
8 ounces ground pork
3 ounces finely ground Parmesan cheese
1/3 cup finely chopped Italian parsley
1 teaspoon kosher salt
1/4 teaspoon ground black pepper
2 large eggs
2 large garlic cloves, minced
1 pound spaghetti
Freshly grated Parmesan cheese
– Combine tomatoes with juice, butter, onions, and salt in large wide pot. Bring to simmer over medium heat. Reduce heat; simmer uncovered 45 minutes, stirring occasionally.
– Discard the onions. Using immersion blender, process sauce briefly to break up any large pieces of tomato (texture should be even but not completely smooth). Season sauce with more salt and freshly ground black pepper. Remove from heat.
– Combine the breadcrumbs and milk in small bowl; stir until breadcrumbs are evenly moistened. Let stand 10 minutes.
– Place beef and pork in large bowl and break up into small chunks. Add 1 cup ground Parmesan, parsley, salt, and pepper.
– Whisk eggs to blend in small bowl; whisk in garlic. Add to meat mixture.
– Using hands, squeeze milk from breadcrumbs, reserving milk. Add breadcrumbs to meat mixture. Using hands, quickly and gently mix meat mixture just until all ingredients are evenly combined (do not overmix). Chill mixture at least 15 minutes and up to 1 hour.
– Moisten hands with some of reserved milk from breadcrumbs, then roll meat mixture between palms into golf-ball-size balls, occasionally moistening hands with milk as needed and arranging meatballs in single layer in sauce in pot. Bring to simmer.
– Reduce heat to medium-low, cover, and simmer until meatballs are cooked through, 15 to 20 minutes.
Homemade Pork Buns!
Dear Pork,
We meet again. This time things got intense. As per usual I was dabbling in vegetarianism, reading books like “Animal Factory” and “Eating Animals” and having thoughts like “I just can’t keep eating meat”. Then I bought a groupon for Barnes and Noble. Dammit, I blame it on them. I was perusing the shelves, looking for just the right present to myself (I’ve imposed a cookbook moratorium on myself so this was a big day). Then I saw it. A book I’ve been dreaming about since I read about it online: “Asian Dumplings” by Andrea Nguyen. My Lord, it’s like she wrote a book just for me. I snatched it up and stayed awake that night reading it cover to cover. But I’ve been so busy with my new business that I just didn’t have time to make anything from it for months! But finally, I got a day off. And what did I do? I made pork buns. Sticky, messy, slightly sweet, cracktastic pork buns.
First I marinated you in a magical sauce with all kinds of delicousness: five spice powder, hoisin sauce, honey, soy sauce and much more.

Then I laid you on a rack to go in the oven.

And roasted you until you were all glossy and charred and happy looking.

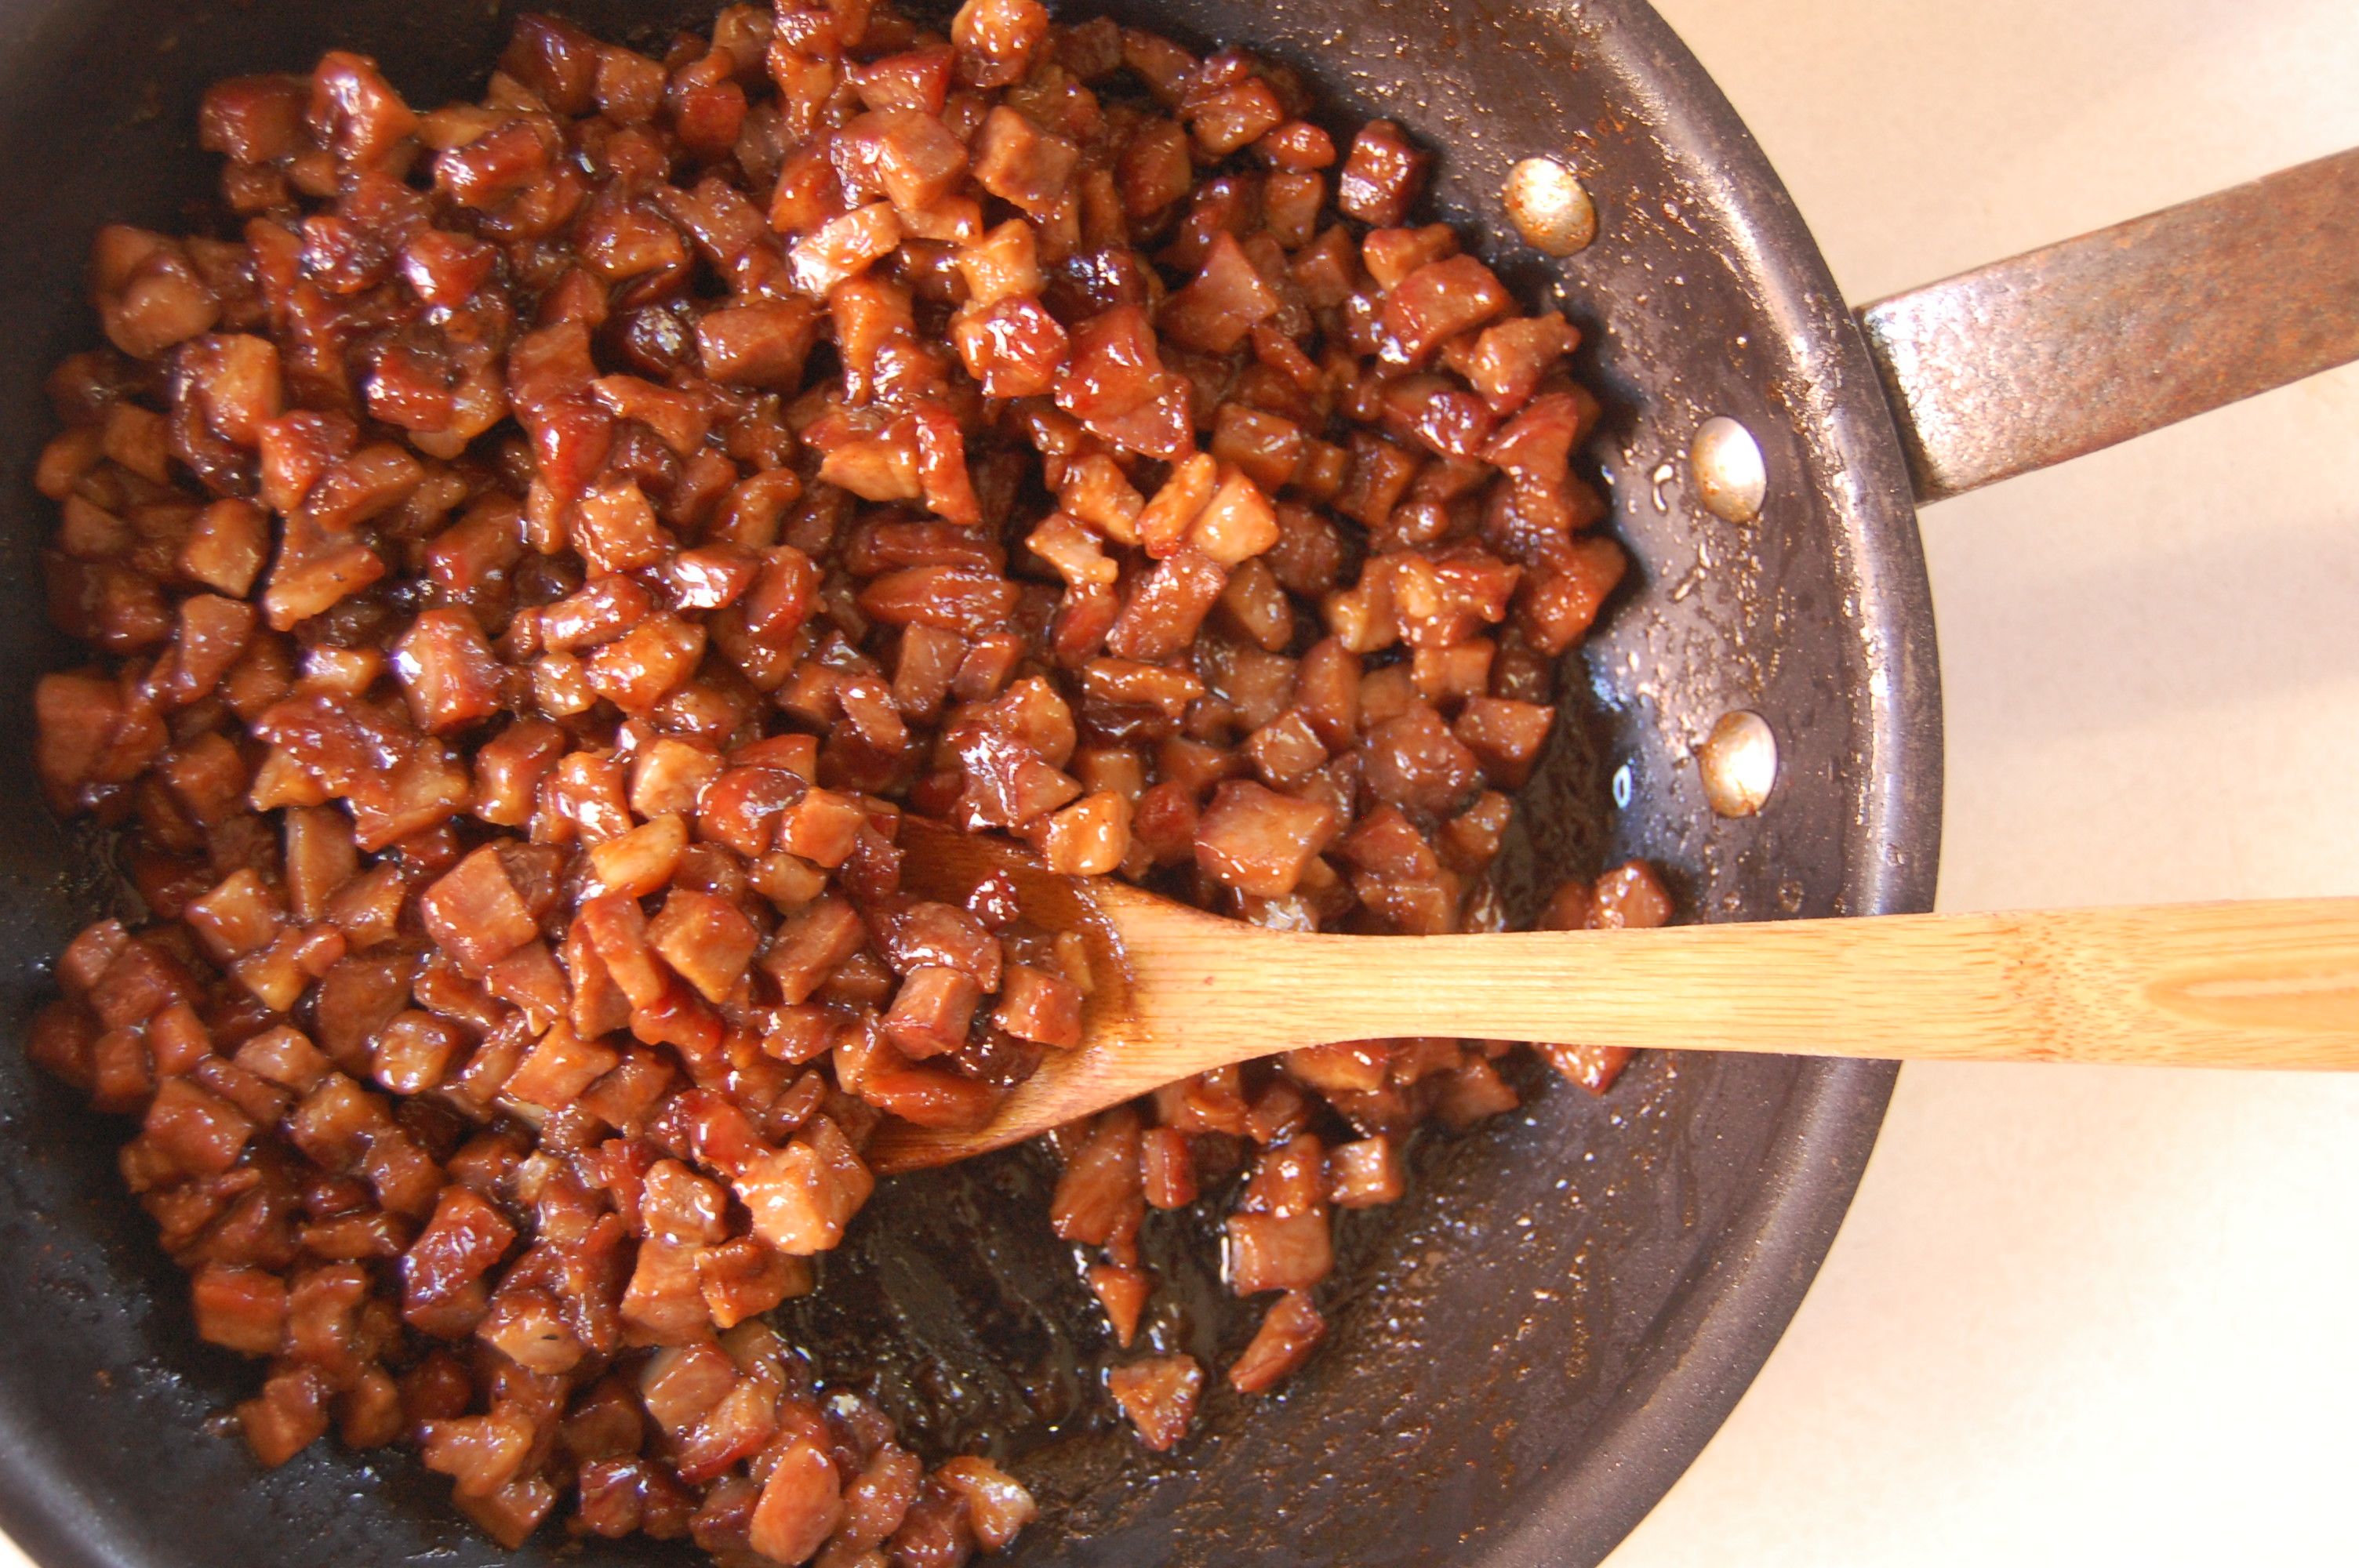
From there I took it a step further. I chopped you up into itty pieces and cooked you with more delicious sauciness.

While you waited patiently, I made a dough, a dough not too different from my favorite hamburger bun dough. I cut that dough into chunks.

And then I encased you in that dough, giggling with every pleat.

You made adorable dumplings.

I let your dough rise until soft, and then I roasted you again. I pulled you from the oven and glazed you with honey. And then me and friends devoured you. Oh my, sweet pork, you do continue to surprise me. Thank you, for setting me straight again.

PORK BUNS RECIPE (Andrea Nguyen):
Char Siu Pork:
1 lb bonelss pork shoulder
1 big clove garlic
1 1/2 TBSP sugar
1/4 + 1/8 tsp five spice powder
2 TBSP 3/4 tsp hoisin sauce
1 1/2 TBSP honey
1 TBSP + 1/2 tsp Shaoxing rice wine
2 1/2 TBSP soy sauce
1 1/2 tsp sesame oil
– Cut the pork into strips that are 1 1/2” thick.
– Mix the rest of the ingredients in a bowl large enough to fit the pork, this will be the marinade. Remove 1/3 of the marinade to a small bowl and store in the fridge. This will be used later on for basting the pork as it roasts. Toss the pork in with the rest of the marinade to coat evenly. Cover and refrigerate for 6-8 hours, turning the pork 2-3 times.
– Remove the pork and reerved marinade from the fridge and let sit at room temperature for 45 minutes. Preheat the oven to 475 degrees. Line a baking sheet with aluminum foil and place a roasting tack on top. Put the prok on the rack, leaving an inch between the pieces for heat circulation. Discard the used marinade.
– Roast for 30 minutes, basting both sides of the pork with the marinade every 10 minutes. Flip the pieces over at every interval. T]he pork is done when it is glazed and slightly charred, Remove from the oven. Let the meat rest for 10 minutes before using.
Pork Bun Filling:
1 TBSP sugar
1 pinch of salt
1 pinch of white pepper
1 TBSP soy sauce
2 tsp oyster sauce
1 TBSP water
2 tsp canola oil
2 scallions (white and green parts), chopped
1/2 pound Char Siu Pork, diced
1 tablespoon Shaoxing rice wine
1 1/2 TBSP cornstarch dissolved in
2 TBSP water
– To make the flavoring sauce, combine the sugar, salt, white pepper, soy sauce, oyster sauce, and water in a small bowl. Stir to dissolve the sugar and set aside.
– Heat the oil in a medium skillet over medium heat. Add the scallions, and cook, stirring constantly, for about 30 seconds, or until aromatic and slightly softened. Add the pork and combine well. Add the flavoring sauce and cook, stirring frequently, for about 2 minutes, or until the pork is heated through. Meanwhile, add the rice wine to the dissolved cornstarch. When the pork is hot enough, add the wine and cornstarch mixture. Cook for another 30 seconds, stirring constantly, until the mixture comes together into a mass that you can mound. Transfer to a bowl and set aside to cool completely before using. (The filling can be prepared up to 2 days in advance, covered with plastic wrap, and refrigerated. Return to room temperature before using.)
Dough:
10 TBSP whole milk
4 TBSP butter
2 tsp rapid-rise (instant) dry yeast
2 1/2 TBSP lukewarm water
1 large egg
2 1/2 TBSP sugar
12 1/2 oz All-purpose flour
1 large egg, lightly beaten
2 TBSP honey mixed with 1 TBSP warm water
– For the dough, melt the butter with the milk in a saucepan over medium heat. Set aside to cool for about 5 minutes, or until warm (about 110°F).
– Put the yeast in small bowl, add the water, and set aside for 1 minute to soften. Whisk in the milk mixture and the egg to blend.
– Combine the sugar and flour in a food processor. Pulse two or three times to blend. With the machine running, pour the yeast mixture through the feed tube in a steady stream. After a sticky mass of very soft dough forms, about 5 seconds, continue processing for 45 to 60 seconds to form a smooth, slightly sticky dough that mostly cleans the bowl. The finished dough should stick a bit to your finger when pressed. Alternatively, to make the dough by hand, combine the sugar and flour in a large bowl. Make a well in the center and pour in the yeast mixture. Slowly stir with a wooden spoon to work in all the flour. (Add water by the teaspoon if this doesn’t happen with relative ease.) Keep stirring as a ragged, soft mass forms. Then use your fingers to gather and pat the dough into a ball. Transfer to a work surface and knead for about 5 minutes, or until smooth, fingertip soft, and slightly elastic. (You should not need any additional flour on the work surface if the dough was properly made. Keep kneading and after the first minute or two, the dough should not stick to your fingers. If it does, work in a sprinkling of flour.) Press your finger into the dough; it should spring back, with a faint indentation remaining.
– Regardless of the mixing method, lightly oil a clean bowl and add the dough. Cover with plastic wrap and put in a warm, draft-free place (for example, the oven with the light on) to rise for about 45 minutes, or until nearly doubled.
– Line 2 baking sheets with parchment paper before beginning to assemble the buns.
– Remove the dough from the bowl and put on a lightly floured surface. Knead it a few times, then cut it in half. Cover one-half with plastic wrap or an inverted bowl to prevent drying. Roll out the dough into a 12-inch log, and then cut it into 8 or 16 pieces for medium or small buns, respectively. (Halve or quarter the log first to make it easier to cut even-size pieces. The tapered end pieces should be cut a little longer than the rest.) Lightly roll each piece between your hands into a ball and then flatten each one into a 1/4-inch-thick disk. Use a wooden dowel-style rolling pin to roll the pieces into circles, about 2 1/2 inches in diameter for small or 31/4 inches in diameter for medium buns. The rim should be thinner than the center; keep a 1-inch-wide belly. The finished circle will rise as it sits. Lay the finished circles out on your work surface, lightly dusting their bottoms with flour if you fear they will stick.
– To form a bun, hold a dough circle in a slightly cupped hand. Use a spoon or fork to center about 2 teaspoons of filling for small buns, or about 4 teaspoons of filling for medium ones, on the dough circle, pressing down very gently and keeping about 1/2 to 3/4 inch of the dough clear on all sides; your hand will automatically close slightly. Use the thumb of the hand cradling the bun to push down the filling while the other hand pulls up the dough edge and pleats and pinches the rim together to form a closed satchel. Pinch and twist the dough closed at the end. Place the bun pleat side down on the prepared baking sheet. Repeat with the remaining dough circles, spacing them 11/2 inches apart on the baking sheet. Loosely cover with plastic wrap or a kitchen towel. Set in a warm, draft- free place (for example, the oven with the light on) for 30 minutes to rise. Meanwhile, work on the other dough half to form more buns.
– To bake the buns, about 10 minutes before the rising time is over, position a rack in the middle of the oven and preheat to 350°F. (Let the buns finish rising at room temperature if you’ve had them in the oven.)
– Bake one baking sheet at a time, brushing the top and side of each bun with the egg right before baking. Bake small buns for about 14 minutes and medium buns for about 18 minutes, or until a rich golden brown; the cooked buns sound hollow when tapped on the bottom. Remove them from the oven, set on a rack, and let cool for 5 minutes.
– Brush the honey mixture on the buns for a sweet-glaze finish that will also soften the crust. Enjoy warm and out of hand. Refrigerate left- over buns for up to a week and reheat at 350°F for 8 to 10 minutes, until hot. When making the buns in advance, wait to brush on the glaze until after you’ve reheated the buns. These buns may also be frozen for up to a month. Thaw them completely before reheating.
Piggy’s Got a New Blanket
Okay, time to own up to another guilty pleasure.
You might remember a certain love letter, to a certain carnitas, written many a month ago. Well, it is carnitas time again. I mean, when is it ever not carnitas time…. We’ve been hard at work on The Pantry, and there’s nothing quite like building your own business with your bare hands to work up an appetite. We’ve been working so hard, in fact, that I invited my most carnivorous friend Scott to Seattle, to help my tiny little muscles. Because in case you didn’t know this, construction, it is physical. After weeks ripping sheet rock from the walls, nailing boards to form our new ceiling, scraping the linoleum off of the floor to find (gasp!) a SECOND layer of linoleum, I found myself with a small bit of time before we start jackhammering (oh yeah, you heard me) the concrete in our future garden. Give me a night off with some of my meat-loving friends, and some porky goodness is sure to show up. Carnitas. That deliciously salty, crispy, sweet, melt in my mouth porkfest was calling. But hold your carnitas, because there’s new tortilla in town.
Here’s the thing. I know you’re supposed to like corn tortillas better, because that’s the “authentic” Mexican way. But guess what? I’m not from Mexico. In fact, being from Alabama, I’m doing good just to have graduated past Taco Bell. So I’m here to admit for the world wide web to hear: I like flour tortillas better. Not the stretchy, gummy kind of steamed flour tortillas you get at a taqueria (oh how I miss you, dear Mission district), but something with some chew to it. Blistered from heat and even a little puffy. I could munch on good flour tortillas daily. The problem? Good flour tortillas are few and far between. As per usual, I thought, why not make my own? So I did. And they were perfection. I now pass the baton to you.

A note about lard: If you don’t have time to make your own, then you should be able to find freshly rendered lard at a good butcher shop. Even if you don’t see it, just ask, because sometimes they keep it hidden away. This time I got my lard from Rainshadow Meats on Capitol Hill.
Flour Tortillas Recipe:
Makes 8 tortillas.
2 cups AP flour
1 tsp baking powder
1 1/4 tsp salt
6 TBSP fresh lard, RT
3/4 cup milk, warm
– Mix together the flour, baking powder and salt. Add the lard and work in you’re your hands until all of the flour is coated.
– Add the warm milk and stir the mixture with a spoon until it forms a dough. Knead for 4 minutes on a floured surface. The dough should be firm and soft.
– Place the dough in a bowl and cover with a damp cloth or plastic wrap for 30 minutes.
– After the dough has rested, roll it into a log. Slice the log into into eight discs. Use your hand to flatten each disc, then place on a plate without touching each other. Cover the dough with a damp cloth or plastic wrap for 10 minutes. After the dough has rested, one at a time place a piece on a floured surface and roll with a rolling pin from the center until it’s thin and about eight inches in diameter. Keep rolled-out tortillas covered until ready to cook.
– In a dry cast iron skillet heated on high, cook the tortilla about thirty seconds on each side. It should start to puff a bit when it’s done. Keep cooked tortillas covered wrapped in a cloth until ready to eat. They can be reheated in a dry iron skillet.
The Ultimate Wintery Nuts
First, an announcement.
I’m starting a business! And not just any business, I’m starting my DREAM business! I’m teaming up with Brandon Pettit, owner of Delancey (were I am the pastry chef) and the super talented Olaiya Land, who runs Olaiya Land Catering and teaches classes in Delancey on closed nights to open up a community kitchen called “The Pantry at Delancey.” We’re blowing out the wall behind Delancey and building an awesome kitchen. Think rustic. Yet urban. Think 16′-long farm table. Jars of pickles and jams lining the walls. The idea is to get people around the table, cooking, learning, and talking. We’ll host family-style dinners, teach hands-on cooking classes with an emphasis on craft, provide locally sourced catering, host community events and begin making the cheese and curing the meats for Delancey. It’s just too much good stuff. I would send you to a website, except it isn’t finished yet. Until it is, you can find us on facebook. So know that while I have slowed down a bit on my blogging, it is only because things are HAPPENING!
Now, about these nuts. They are my new favorite wintertime crack. I developed the recipe for Delancey over the summer, when we were opening a patio and tinkering with the idea of bar snacks. They were quite a hit until the weather turned warm, when their dark spiciness started to look silly next to a fresh tomato salad. So we pulled them for the duration of the warm weather and just this week brought them back. I. love. them. So much that I want to share.
You start with a good mix of nuts. I like almonds, cashews, pistachios and pecans, but you can try any mix you like. Except the pecans are a must. They have a density that fits this kind of candying like peanut butter to jelly. I usually throw in some extra of those, to make up for the ones I end up snacking on.

I made a syrup out of water and sugar and brought that to a boil. I then added the nuts, along with the spice bomb and let them simmer away for a bit.

Then I strained the nuts out of the syrup and roasted them.

Until they were nice and deeply caramelized.

Then began the fun, candying some bacon to throw in the mix. Because what’s the point of spiced nuts without some pork?

I coated bacon with brown sugar and roasted it until the sugar was dark and caramelized.

I tore the bacon into chunks and tossed it with the nuts. And I’ve been munching away since…

SPICED NUTS WITH CANDIED BACON RECIPE:
2 TBSP vegetable oil
3½ cups sugar
3 cups water
4 cups raw nuts
1 TBSP + 1 tsp salt
2 tsp garam masala
1 tsp cumin
⅛ tsp cinnamon
⅛ tsp allspice
1½ tsp cayenne
12oz sliced bacon
1½ cups brown sugar
– Preheat the oven to 400 degrees.
– Coat a baking sheet with the vegetable oil. Set aside.
– Combine the sugar and water in a large pot and bring to a boil. Lower heat to medium high and add the nuts, salt and spices. Bring up to simmer and cook for 8 minutes.
– With a slotted spoon, remove nuts from pot, shaking off excess liquid. Spread onto the oiled baking sheet. Reserve the liquid for future batches of nuts.
– Roast in the oven until browned, about 15 minutes. Remove from oven and let cool completely.
– Lower oven to 350 degrees. Line a baking sheet with a silicon mat. Sprinkle half of the brown sugar onto the silicone mat. Place the bacon onto brown sugar and sprinkle on the remaining brown sugar.
– Roast for about 25 minutes, flipping bacon 3-4 times, every 7-8 minutes. The bacon should look caramelized. Remove from oven and use tongs to lift the bacon onto a clean tray. Cool completely.
– Chop bacon and toss with nuts.
– Taste for salt adjustment.
Chili Verde!
Oh tomatillos. They are everywhere. In my kitchen at least. It was a pretty full harvest from my garden and now I am elbow deep in them while trying to find the best salsa recipe. But before that, let me tell you about my most favorite stew. Chile Verde it’s called, and I just go bananas for it. There’s tomatillos, chiles, pork, cilantro… it’s a delicious thing. Since Seattle is slightly lacking in the Mexican food department, I’m long overdue for a bowl.

I started by roasting the tomatillos under the broiler with some garlic.

Then I roasted until black some chiles over the flame of my stove.

Lots of pork was diced up.

And browned in a wide shallow pot. Afterwards some onions were added to get nice and soft.

Then I pureed those toasted tomatillos, garlic and chiles with some fresh jalapenos and cilantro.

I added the puree to my pork and onions with some chicken stock and let her simmer for 3 hours. And then we ate ourselves silly.

CHILE VERDE RECIPE:
2 lb tomatillos
6 garlic cloves, not peeled
3 Anaheim or Poblano chiles
3 Jalapeños, seeds removed, chopped
1 bunch cilantro leaves, chopped
4½ lb pork shoulder, trimmed of excess fat and cut into 1 to 2-inch cubes
Olive oil
2 small yellow onions
2 garlic cloves, minced
1 TBSP dried oregano
3 cups chicken stock
– Remove papery husks from tomatillos and rinse well. Cut in half and place cut side down, along with 6 garlic cloves, on a baking sheet. Place under a broiler for about 5-7 minutes to lightly blacken the skin. Remove from oven and set aside to cool.
– Roast the Anaheim chiles over a gas flame or under the broiler until blackened all around. Let cool and remove the skin, seeds, and stem. Roughly chop.
– Place tomatillos, skins included, into a food processor. Remove the roasted garlic cloves from their skins and add them. Add chopped Jalapeño peppers, Anaheim chilies, and cilantro. Pulse until all ingredients are finely chopped and mixed.
– Season the pork cubes generously with salt and pepper. Heat olive oil in a large, heavy-bottomed dutch oven over medium high heat and brown the pork chunks well on all sides. Work in batches so that the pork is not crowded in the pan. Using tongs, lift the browned pork out and place in bowl. Set aside.
– Pour off excess fat, leaving 1 or 2 tablespoons. Place the onions in the same dutch oven and season with salt. Cook over medium heat, stirring occasionally until limp, about 5 minutes. Add the minced garlic and cook for another minute. Add the pork back to the pan. Add the oregano, the tomatillo puree, and the chicken stock. Bring to a boil and reduce to a slight simmer. Cook for 2½ – 3 hours uncovered, until the pork is tender.
– Adjust the seasoning to taste with salt. Serve with rice and warmed flour or corn tortillas.
The Hottest Buns in Town
Whew. My first 4th of July in Seattle and wow, it was fun. Old friends in town, new friends coming over, lots of food and fireworks and slap scrabble. It was our first party in a Seattle and I’m so glad we did it. But WHEW! There was cooking going on in my tiny kitchen, SO much cooking. Four pies were baked: cherry almond, black raspberry (I didn’t even know such a thing existed until this week!), strawberry rhubarb custard and blueberry lattice. A gigantic cabbage salad with a peanut dressing. More baked beans than I think anyone wants to see in one place. And pulled pork sandwiches. I wanted pulled pork sandwiches badly. Having never made them, I turned to the Lee Bros. for their recipe. Did I mention that we’re talking about 13 lbs. of pork?

It was an intimidating amount of meat. And while the flavor was fantastic (think tomatoes, apple cider vinegar, cane syrup), I have to fault the Lee Bros. for tricking me into thinking that pork shoulder would get as meltingly tender as I wanted in the amount of time they claimed. I now know that pulled pork wants at least 8 hours if you’re on the low-oven-roasting path. It was a close one and I have Sam and Brandon to thank for pulling a delicious dish out of the mess I started, because by the time we realized that the pork needed several more hours of roasting to liquify all that fat, we had already eaten all of the salads, sides and pies in the house. Not to mention the copious amounts of wine I had befriended by then. Thank God for chef friends who are more than competent at drunken cooking!

At some point John made a diagram about when to stop cooking the meat. It was a question of quality vs. time, measuring the increasing quality of the pork as it cooked and our changing expectations relating to our hunger levels. I swear it was genius at the time.

By now you’re maybe thinking “Gee Brandi, your last 3 posts are about meat. What gives?” It’s true, we’ve been awfully carnivorous this month. Which is why I will now turn my attention to the real reason I’m here talking about a pulled pork dish that I can’t even begin to explain how it came to be. My point? The bun. I will admit that when I mentioned to some people that I wanted to make my own buns, there was some skepticism. It was too much work, they said. There are perfectly good buns out there that somebody else made. But I just didn’t buy it. I mean, EVERYONE has a pulled pork recipe up their sleeve (well, except me apparently), but when a girl really wants to take it to the next level, then it’s the bun that gets people’s attention. So I made them anyways. Even though with 4 pies (3 requiring pre-baked crusts), an ungodly amount of beans, and half a day’s worth of pork, we were totally out of oven space.
And you know what people talked about the most at the BBQ? Those sexy little buns of mine.
There were lots of them, rising all over the house.

They were glazed with egg and sprinkled with seeds.

And then baked until they were puffed and golden.

I don’t care how much effort they were (not THAT much really), I’m never buying a bun from the store again.

And just so no one thinks I’ve stopped caring about dessert, here’s a blueberry lattice pie that was devoured in about 15 minutes flat.

LIGHT BRIOCHE BUNS RECIPE (adapted from Comme Ça restaurant, printed in the New York Times):
3 TBSP warm milk
2 tsp active dry yeast
2 1/2 TBSP sugar
2 large eggs
3 cups bread flour
1/3 cup all-purpose flour
1 1/2 tsp salt
2 1/2 TBSP unsalted butter, softened
Sesame or poppy seeds (optional)
1. In a glass measuring cup, combine one cup warm water, the milk, yeast and sugar. Let stand until foamy, about five minutes. Meanwhile, beat one egg.
2. In a large bowl, whisk flours with salt. Add butter and rub into flour between your fingers, making crumbs. Using a large spoon, stir in yeast mixture and beaten egg until a dough forms. Knead until smooth and elastic, about 8 to 10 minutes. You can either transfer the dough to a clean surface for this or knead it right in the bowl. It’s a touch sticky, but resist the urge to add more flour.
3. Shape dough into a ball and return it to bowl. Cover bowl with plastic wrap and let rise in the fridge. This long proofing time will make a nicer flavor and also make it easier to shape while cold.
4. Line a baking sheet with parchment paper. Divide the dough into 8 equal parts. Gently roll each into a ball and arrange two to three inches apart on baking sheet. Cover loosely with a piece of plastic wrap lightly coated in nonstick spray and let buns rise in a warm place for one to two hours, until they almost double in size.
5. Set a large shallow pan of water on oven floor. Preheat oven to 400 degrees with rack in center. Beat remaining egg with one tablespoon water and brush some on top of buns. If desired, sprinkle with seeds. Bake, turning sheet halfway through baking, until tops are golden brown, about 17-18 minutes. Transfer to a rack to cool completely.
Potstickers!
Fun! Fun! Fun! I made potstickers!
It’a been on the list for a while. But I’ve never cooked Chinese, so I just never needed an appetizer to match. This week I decided it was time. I was making Kung Pao Chicken (ok, so maybe that’s not REAL Chinese) and potstickers were in order!
There was a bit of chopping involved.

But that was the hardest part. At least for the filling.

And there was a dough. I was skeptical at first, because all the recipes called simply for flour and water. But it worked!

I rolled out little 4″ discs and plopped on some filling.

And then I made little pleated pouches! So damn cute!

I fried the pouches in peanut oil, then poured in some water and covered them so that they could steam.

And they were delicious! Well worth it. I even made extra ones and froze them for later.

PORK POTSTICKERS RECIPE:
Pork Filling:
1 lb ground pork
1/2 cup napa cabbage, minced
1 stalk green onion, minced
1/2 cup bamboo shoots, minced
1/4 cup ginger root, minced
3 TBSP soy sauce
2 TBSP sesame oil
1 TBSP corn starch
– Throw everything in a bowl and mix well. Cover and store in the fridge.
Dough:
4 cups flour
1 1/2 cup warm water
– Put flour and half of the water in a bowl and stir with a fork. Slowly add in more water, a TBSP at a time. Once it is stiff enough, knead. Keep adding water until it is smooth, but not sticky. You might not use all of the water.
– Cover with a damp towel and let sit for 30 minutes to relax the gluten.
– Cut into chunks and roll into 3-4 inch discs.
– Place roughly 1 TBSP of filling in the center and shape into a pouch.
– Heat oil in a pan over high heat. Place potstickers in pan and fry until the bottoms are nice and browned.
– Shielding your face with the lid, pour in some water (1/2 a cup or so) and cover immediately. Lower heat to medium low and cook for 6 minutes.
– Place potstickers on plate to cool while you mix dipping sauce.
Dipping sauce:
1/2 cup soy sauce
3 TBSP red wine vinegar
1/2 tsp sesame oil
1/2 tsp chili garlic paste
1 tsp minced ginger
1 clove garlic, minced
1/2 tsp sugar
– Mix everything together.
Fried! Pig! Skin!
Dear Pork,
You did it again. You made me fall in love with you all over. It started months ago, you see. Living in San Francisco. There was this guy, Ryan Farr his name was. He was making magic with pork skin, and his chicharrones were showing up all over town. I was deeply jealous. I hated him for knowing you in a way that I didn’t. I mean, I grew up in ALABAMA – I should be frying pig skin in my SLEEP! Why wasn’t I grandfathered in on the secret? And rumor had it that this Mr. Farr was taking his technique with him to his grave. So I was on my own to find my way into your heart/skin. All hope was seemingly lost, months of searching were fruitless. But then it happened. I read somewhere that the new Momofuku cookbook was spilling the beans. Step by step directions for perfect chicharrones. I ordered some fatback from my new favorite butcher shop and left the house 5 minutes later to buy a copy. There was no stopping me now.
When my fatty skin came, I was enthralled. You looked so innocent, like a topographical map of a Washington state. I could have stared at you all day, folding you into different shapes.

But we were at the beginning of a long journey together, so I needed to get to work. First I separated your skin from your fat.

I put your skin in a pot of water and boiled you for 1 1/2 hours, long enough to soften up the fat left clinging to you.

The rest of your fat I cubed up and put in another pot, with a bit of water. Because when you have that much fat sitting on your kitchen counter, you might as well render some lard.

After your skin was done boiling, I stretched you out and placed you in the fridge. There you chilled for another 2 hours. Then I set about the arduous task of scraping off every last bit of fat. The book recommended the side of a spoon, but I had to use a knife. Because this was OUR moment and I wanted you to be perfect. Then I popped you in the dehydrator and let you do your thing overnight.

In the meantime, I still had some fat melting away on the stove. It took 8 hours, but eventually you released all your juiciness.

I strained you, smashing to get every last drop of liquid fat.

And was very pleased with your color, almost perfectly clear.

When you cooled, you were beautiful. Snowy. Pure.

I slept well, knowing that when I awoke the next morning, you would be ready for me. And you were. 12 hours in the dehydrator had left you thin and leathery. I broke you into tiny pieces.

I heated your lard to 390 degrees and tossed in your skin, one piece at a time.

It was magnificent to see you puff up to 5 times your size. I like to think that was you swelling with love.

I tossed you in a spice mix I had prepared earlier. And you were glorious. Light, fluffy, melt in my mouth glorious. You were a lot of work, but Pork skin, you were worth it. Thank you.

Spice Mix recipe:
1/2 tsp paprika
1/2 tsp cayenne
1/4 tsp black pepper
1/4 tsp cumin
1/4 tsp white pepper
1 TBSP salt
1 TBSP sugar
Jambalaya!
This isn’t really a post. It’s more like a mention, because this was the tastiest jambalaya I’ve ever made. I didn’t really take photos, mostly because the beauty of cooking jambalaya is that everything just gets thrown into one pot (preferably an extremely large one). So it’s not the most interesting process, but it is a fantastic dinner.

This is basically John Besh’s recipe, from his new cookbook (which makes me want to hit up the state of Louisiana something fierce). I only changed a few things, mostly not using converted rice (uncle Ben’s) and omitting the celery salt. Because celery salt makes me uncomfortable. Not sure why.
Shrimp, Chicken and Andouille Jambalaya Recipe:
Serves 6-8
12oz andouille sausage, diced
8oz fresh pork sausage, removed from casings
8oz bacon, diced
1 oz butter
2 boneless, skinless chicken thighs
Salt, to taste
Black pepper, to taste
2 celery stalks, diced
1 large onion, diced
1 green bell pepper, diced
3 garlic cloves, minced
1/2 tsp dried thyme
1 dried bay leaf
2 1/4 tsp paprika
1/2 tsp cayenne pepper
2 1/4 cups white rice
1 15oz can crushed tomatoes
2 1/2 cups rich chicken broth
1 1/4 lb shrimp (preferably Louisiana white), peeled and deveined
– Preheat a large cast-iron pot over high heat. Lower the heat to medium and add the sausages, bacon and butter. Cook the meat as evenly as possible, stirring slowly, until the fat is released.
– Season the chicken with salt and pepper, add it to the pot. Once the chicken has browned, about 5 minutes, add the onions and cook for 15 minutes. Add the bell pepper, celery and garlic. Continue to stir, allowing the ingredients to brown without burning, about 5 minutes.
– Add the thyme, bay leaf, paprika, cayenne, and rice. Keep stirring for 5 to 7 minutes over medium heat.
– Add the tomatoes and broth, raise the heat back to high until the liquid boils, and then cover and reduce to a low simmer until rice is almost cooked through, about 25 minutes.
– Season the shrimp with salt and pepper, and add them to the pot. Keep the pot covered for an additional 10 minutes before removing from the heat. Season to taste.
What Hamburger Helper Wanted To Be When It Grew Up
I know, this post is really pushing it. Some of you will forever think I am just plain gross. It’s thanksgiving week and I’m posting a recreation of a classic Hamburger Helper dish. What can I say? I’m at home sick (it’s been a week, I’m dying here!), I’m moving to Seattle in 5 days, I want comfort food and I can’t help it, sometimes I just like to reverse engineer recipes. A year ago the chef at the restaurant I worked at cooked a family meal that smacked of Hamburger Helper, and since then I’ve been obsessed with recreating Cheeseburger Macaroni. But of course I needed to up the game, so I made it Bacon Cheeseburger Macaroni. Well…duh…I think that was an obvious move. Definitely not a date night dish, but great for those nostalgic moments (I can admit it, I grew up in Alabama eating some pretty trashy food). Don’t judge me too harshly.
I started by slowly cooking the bacon, to render its fat. I probably cooked it for about 15 minutes on medium low.

Then I added a diced onion, a carrot, a green bell pepper and a jalapeno. I know technically there weren’t vegetables in the Hamburger Helper version, but come on people, we’re adults now. Kind of. I cooked those on medium until the onions started to turn translucent. Then I threw in 2 minced garlic cloves and cooked it all for a minute more.

Then I added some ground beef and chili powder. I cooked it all until the beef was nicely browned.

Then I added in tomato sauce, tomato paste and worcestershire sauce. I cooked that for about 10 minutes.

Then I added the sour cream and cooked it a few minutes longer. This is the part where it looks seriously unappetizing. But if you can hang in there, it’s worth it.

I turned off the heat and stirred in the cooked macaroni and the shredded cheddar cheese. I stirred it for a good while, to melt the cheese into the sauce. Then I added salt and pepper to my liking. And then I ate it. I’m not gonna lie, this recipe makes quite a lot of pasta. Probably enough to feed 6-8 people. But this one time, when I was testing out the recipe, 4 of us ate the entire thing. And then ate an apple pie. Shameful.

Bacon Cheeseburger Macaroni Recipe:
3 slices bacon, diced
3/4 cup chopped onion
3/4 cup chopped green bell pepper
1/2 cup chopped carrot (optional)
1 jalepeno, chopped
2-3 garlic cloves, minced
1 lb ground beef
1 TBSP chili powder
1 TBSP worcestershire sauce
2 TBSP tomato paste
3/4 cup tomato sauce
1 cup sour cream
12 oz macaroni, cooked and drained.
8 oz shredded cheddar cheese
salt and pepper
– Cook bacon on medium low heat until it is halfway cooked and releases it’s fat.
– Add onions, bell pepper, carrots and jalepeno and cook until onions are translucent.
– Add garlic and cook for 1 minute.
– Add ground beef and chili powder and cook until browned.
– Add worcestershire, tomato paste, and tomato sauce and cook for 10 minutes.
– Add sour cream and cook for 5 minutes.
– Add noodles and stir well.
– Add cheese and stir well.
– Season with salt and pepper to taste.


18 comments